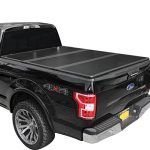
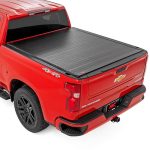
You’ve invested in a sleek tonneau cover to shield your truck bed from the elements, but a recent downpour revealed a frustrating truth: water is pooling in the corners, and your gear is damp. This common issue doesn't mean your cover is a failure; it often means its waterproofing needs attention. A truly watertight seal is not always a given, but it is an achievable standard with the right knowledge and maintenance.
Understanding how to waterproof your tonneau cover is crucial for protecting valuable tools, outdoor equipment, or luggage from rain, snow, and road spray. A compromised seal can lead to rust, mold, and costly damage to both your cargo and your truck bed. This comprehensive guide will walk you through the principles of tonneau cover waterproofing, from diagnosing leaks to applying advanced sealants and performing preventative maintenance. You will learn practical, step-by-step methods to achieve a dry bed, regardless of your cover's age or style.
Understanding the Enemy: How Water Finds Its Way In
Before you can fix a leak, you must understand how water breaches your tonneau cover's defenses. Water intrusion is rarely about a single gaping hole; it's usually due to capillary action, wind-driven pressure, and minor misalignments. The primary entry points are typically the front bulkhead near the cab, the tailgate seal, the seams between folding panels or roll-up slats, and the drainage channels or weep holes themselves if they become clogged or misdirected. Even the highest-quality covers can develop leaks over time as seals compress, materials weather, and the truck bed flexes during driving.
Consider the physics at play. At highway speeds, wind forces rain and moisture into seemingly tight spaces. If your tailgate isn't perfectly aligned or the seal along its top is worn, water will be driven right in. Similarly, debris like pine needles or mud can block designed drainage paths, causing water to back up and overflow into the bed. It’s also important to distinguish between "waterproof" and "water-resistant." Most vinyl and fabric covers are inherently water-resistant, but achieving true waterproofing relies on the integrity of the sealing systems around the perimeter and between panels.
Your first action should be a thorough diagnostic test. On a dry day, have a helper use a garden hose on a gentle shower setting while you sit inside the truck bed with a flashlight. Start low and slow, spraying sections methodically. Mark leaks with painter's tape. This process will reveal whether the issue is a failed tailgate seal, a shrunken bulkhead gasket, or a compromised panel seam. Knowing the exact entry point is 90% of the solution and prevents you from applying sealants where they aren't needed.
Essential Tools and Materials for the Job
Arming yourself with the right products is critical for effective and long-lasting waterproofing. Using incorrect materials can damage your cover or create a messy, temporary fix. The core arsenal for this task includes a high-quality silicone-based sealant or a specialized rubberized sealant designed for automotive and marine use. Silicone is excellent for its flexibility and UV resistance, while rubberized coatings can fill larger gaps. For seals and gaskets, closed-cell foam weatherstripping tape is a versatile choice, as it compresses well and doesn't absorb water.
You will also need a supply of isopropyl alcohol and lint-free cloths for surface preparation—the most overlooked yet vital step. Any sealant will fail if applied to a dirty, oily, or dusty surface. For application, have a caulking gun if your sealant comes in a tube, along with a selection of plastic spreaders or even your finger (protected by a nitrile glove) for smoothing. A soft bristle brush and mild soap are necessary for cleaning the cover and channels. For vinyl covers, a dedicated protectant like 303 Aerospace Protectant will help maintain flexibility and water resistance.
When selecting a sealant, read labels carefully. Avoid products that contain acetic acid, as they can corrode metals and may have a strong vinegar smell. Look for neutral-cure silicone. For foam tape, measure the gap you need to fill; a tape that is too thick will prevent the cover from latching properly, while one that is too thin will be ineffective. Having a roll of both 1/4-inch and 1/2-inch widths on hand allows you to tailor your solution. Remember, the goal is to create a seamless barrier, not just to plug holes haphazardly.
Step-by-Step Waterproofing Procedure
Begin by thoroughly cleaning the entire cover, its rails, and the truck bed rails. Use a mild automotive soap and a soft brush to remove all dirt, grime, and old wax or dressings. Pay special attention to the drainage channels along the sides of the cover, using a pipe cleaner or compressed air to clear debris. This ensures water can flow freely to the exits. Once clean, dry everything completely. Then, use isopropyl alcohol on a cloth to wipe down all surfaces where you will apply new sealant or tape. This degreases the area and ensures maximum adhesion.
Next, address the perimeter seals. If the existing bulkhead seal (against the cab) is cracked or flattened, carefully peel it off. Clean the residue with adhesive remover, then apply a new bead of closed-cell foam tape. For the tailgate, the factory seal on the tailgate itself is often the culprit. You can augment this by adding a second layer of D-shaped rubber seal along the top edge of the tailgate where it meets the cover. For leaks between panels on tri-fold or roll-up covers, apply a thin, careful bead of clear silicone sealant along the interior seam. Use your finger dipped in soapy water to smooth it into a clean, flat bead that won’t interfere with folding.
Finally, inspect and treat the cover material. For vinyl covers, apply a UV-protectant conditioner to keep the material supple and prevent it from cracking and shrinking—a common cause of leaks. For hard folding covers, check the rubber gaskets around the latches and hinges. If they are brittle, replace them. After all applications, allow sealants to cure fully as per the manufacturer’s instructions, typically 24 to 48 hours, before exposing the cover to water. Do not rush this curing process, as it is essential for the sealant to achieve its full waterproof strength and elasticity.
Proactive Maintenance for Long-Term Protection
Waterproofing is not a one-time task but an ongoing commitment. Establishing a simple maintenance routine will extend the life of your cover and its seal for years. Every month, or after any major trip, take five minutes to wipe down the cover and clear the drainage channels. These channels, usually small tubes at the front corners of the bed, are the escape route for any water that does get on the cover. A clog here is a guaranteed leak. Use a blast of compressed air or a flexible wire to keep them clear.
Seasonal deep cleaning is also crucial. Every three to four months, give your cover a full clean and conditioning. For vinyl, use a product like 303 Protectant. For aluminum or fiberglass hard covers, use a automotive wax or sealant to protect the finish and the seals embedded within. This prevents UV degradation, which is the primary enemy of rubber and vinyl, causing them to dry out, crack, and lose their sealing ability. Lubricate moving parts, like hinges and latches, with a dry silicone lubricant to ensure they operate smoothly and maintain proper alignment and pressure on the seals.
Be mindful of how you use your cover. Avoid placing heavy objects on the seams when folded, and don’t slam the tailgate, as this can jolt and misalign the sealing systems. In winter, gently brush off snow before it melts and refreezes, which can strain seals and mechanisms. If you notice a new leak, address it immediately. A small issue with a $5 tube of sealant can prevent a larger problem that might require a $50 replacement gasket or, worse, a $500 new cover. Consistent care is the most cost-effective waterproofing strategy you have.
When to Call It: Repair vs. Replacement
Despite your best efforts, there comes a point when a cover is beyond economical or effective repair. Recognizing this threshold saves time, money, and frustration. If the vinyl or fabric is extensively torn, cracked, or has become brittle and shrunken across its entire surface, patching will only be a temporary fix. Similarly, if the frame or rails of a hard cover are bent or corroded, they will no longer provide a level sealing surface, and water will always find a way in. Structural integrity is paramount.
Consider the age and original quality of the cover. A premium cover that is five years old and has a single failed seam is an excellent candidate for repair. A low-cost vinyl cover that is seven years old and leaking from multiple degraded areas may not be worth the investment in materials and labor. Additionally, evaluate the cost and availability of replacement parts. Some manufacturers sell seal kits or specific gaskets for their models, making targeted repair easy. For others, especially discontinued models, finding exact replacement seals can be impossible.
Before deciding to replace, contact the cover’s manufacturer. Many offer warranties on materials and workmanship, and even if yours is expired, they might provide troubleshooting advice or sell you the exact replacement seal you need. If replacement is the answer, use the knowledge you’ve gained: invest in a cover with a robust sealing system, positive user reviews regarding waterproofing, and accessible customer support for parts. Your experience fixing the old one has made you an informed consumer, capable of choosing a product that will stay drier, longer.
Key Takeaways
- ✓ Successful waterproofing starts with a precise leak diagnosis using a hose test to identify exact entry points.
- ✓ Surface preparation with isopropyl alcohol is non-negotiable for proper sealant adhesion and longevity.
- ✓ Use the correct materials: closed-cell foam tape for gaskets, neutral-cure silicone for seams, and UV protectant for vinyl.
- ✓ Regular maintenance, especially clearing drainage channels and conditioning materials, is essential for preventing new leaks.
- ✓ Know when to invest in repair versus replacement, based on the cover's age, material condition, and availability of parts.
Frequently Asked Questions
Can I use any silicone sealant from the hardware store?
Not all silicone sealants are suitable. Avoid acetic-acid curing types, as they can corrode metal parts and have a strong odor. Opt for a neutral-cure, UV-resistant silicone sealant designed for automotive or marine use. These remain flexible in extreme temperatures and adhere better to the materials used in tonneau covers.
How often should I reapply waterproofing treatment?
For sealant on seams and gaskets, a proper application should last 1-2 years. However, you should inspect these seals every six months. The conditioning treatment for vinyl covers should be reapplied every 3-4 months, or as directed by the product, to maintain flexibility and water resistance.
My drain tubes are clear, but water still pools on top of my soft cover. What can I do?
Pooling water indicates the cover is not taut enough. For a soft roll-up or folding cover, check the tensioning mechanisms (often knobs or straps on the sides) and tighten them according to the manufacturer's instructions. The cover should be drum-tight to shed water effectively.
Will waterproofing my cover void the manufacturer’s warranty?
It might. Always check your warranty terms first. Some manufacturers explicitly void the warranty if non-approved sealants are used. If your cover is under warranty, contact the manufacturer about the leak; they may provide a repair kit or specific instructions that keep your warranty intact.
Is a hard tonneau cover inherently more waterproof than a soft one?
Generally, yes. Hard covers, especially one-piece models, have fewer seams and more rigid sealing systems, offering superior initial waterproofing. However, no cover is 100% leak-proof forever. The gaskets and seals on hard covers can still degrade, and they require the same diagnostic and maintenance practices as soft covers to stay watertight.
Conclusion
Achieving a perfectly waterproof tonneau cover is a systematic process that blends careful diagnosis, the correct materials, meticulous application, and consistent upkeep. From understanding how water infiltrates your truck bed to executing a precise sealing procedure and establishing a proactive maintenance routine, each step builds upon the last to create a formidable barrier against the elements. The goal is not just a quick fix, but long-term protection for your truck bed and everything you carry in it.
Take action this weekend. Gather your supplies, perform the hose test to find your leaks, and begin the process of restoring your cover’s integrity. The satisfaction of a dry truck bed after a storm is well worth the effort. By embracing both the initial waterproofing project and the simple habits of ongoing care, you transform your tonneau cover from a potential source of frustration into a reliable guardian of your cargo for years to come.

Tony Kilmer is an auto mechanic and the author behind CarTruckAdvisor.com. He shares practical, no-nonsense guidance on car and truck maintenance, common problems, and repair decisions—helping drivers understand what’s going on and what to do next.