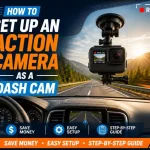
Imagine having an impartial witness for every near-miss, parking lot ding, or unexpected road event. That’s the peace of mind a dash cam provides, transforming your vehicle into a rolling documentarian of the asphalt jungle. But that sleek device is only as good as its installation; a dangling power cord or poorly positioned lens can render it useless when you need it most. This guide demystifies the process, ensuring your dash cam becomes a seamless and reliable part of your vehicle's ecosystem.
Understanding how to properly install a dash cam is crucial because it directly impacts the device's effectiveness, safety, and legality. A haphazard setup can obstruct your view, fail to capture critical footage, or even become a dangerous projectile in a collision. In the following sections, you will learn everything from choosing the optimal mounting position and concealing wires like a professional to configuring settings for maximum utility and navigating the legal considerations of recording on the road. By the end, you'll be equipped to install a dash cam that is discreet, durable, and decisively helpful.
Pre-Installation: Planning and Preparation
Before you peel off any adhesive mounts or start routing cables, successful installation begins with careful planning. Start by thoroughly reading your dash cam’s manual to understand its specific power requirements, mounting options, and any unique features like a rear camera or parking mode. Next, conduct a "dry fit" by holding the camera in your intended location without attaching it permanently. Sit in the driver's seat and ensure the mounting spot provides an unobstructed view of the road ahead without interfering with your line of sight; the ideal placement is typically behind the rearview mirror, on the passenger side. This position minimizes visual distraction while maximizing the field of view.
Gather all necessary tools and materials beforehand to avoid mid-installation frustration. You will likely need a microfiber cloth and isopropyl alcohol to clean the windshield, plastic trim tools or old credit cards to tuck wires, cable clips or ties, and a fuse tap kit if you plan a hardwired installation for parking mode. For most users, the included long cigarette lighter power cable is sufficient, but for a cleaner, permanent look, a hardwiring kit is a worthwhile investment. Also, check your vehicle's manual, particularly regarding the fuse box location and which fuses are safe to tap into, often labeled as "accessory" or "empty."
Consider the legal environment in your region. While dash cams are legal in most places for personal use, some jurisdictions have restrictions on how much of the windshield can be obscured or have specific laws about recording audio without consent. A quick online search for "[Your State/Country] dash cam laws 2026" will provide clarity. Furthermore, think about your primary use case: is it for daily commutes, rideshare driving, or long-haul travel? Your answer might influence whether you prioritize front-and-rear coverage, high-resolution night recording, or extended parking surveillance, guiding your installation approach from the start.
Mounting and Positioning for the Perfect View
The mounting step is critical, as it determines the camera's stability and the quality of its footage. First, use the isopropyl alcohol and microfiber cloth to clean the chosen spot on the windshield inside your vehicle. This removes oils and debris, ensuring the adhesive mount bonds securely and lasts through temperature extremes. Attach the mount to the windshield according to the manufacturer's instructions, applying firm pressure for the recommended time—often 30 seconds to a minute. For cameras that use a suction cup, moistening the cup slightly can create a stronger initial seal.
Positioning is an art that balances a wide field of view with relevant detail. The lens should be centered horizontally as much as possible and angled so that the horizon line sits roughly in the lower third of the frame. This ensures the camera captures the road ahead, the edges of your hood, and a significant portion of the sky. A common mistake is pointing the camera too high, which captures mostly sky and misses critical action on the road. Test this by recording a short clip after temporary placement, then review the footage on your smartphone or computer to check that license plates of cars ahead are legible at a reasonable distance.
Don't forget about the interior cabin. If your dash cam has a cabin-facing lens or a separate interior camera, position it to capture the driver and passenger seats without obstructing your rearview mirror. For rear window cameras, the same principles apply: clean the glass thoroughly, mount it high and centered, and angle it to capture the road behind you. The goal for all cameras is to have a stable, vibration-free mount. A shaky camera produces blurry, useless video. If your vehicle has a dotted frit pattern or tinted band at the top of the windshield, you may need to mount the camera just below it, ensuring the adhesive makes full contact with clear glass.
Power and Wiring: From Messy to Invisible
A professional-looking installation is defined by hidden wires. The goal is to route the power cable from the dash cam to your power source without any loose cords dangling in your field of vision. The most common path is to tuck the cable into the headliner (the fabric on the ceiling), down the A-pillar (the pillar between the windshield and front door), through the dashboard, and into the cigarette lighter socket or fuse box. Use a plastic trim tool to gently pry open seams and tuck the wire in, being careful not to force it and risk damaging clips or airbag covers. Never route wires over or in front of airbag deployment zones, which are often marked on the A-pillar trim.
For a simple plug-and-play setup using the 12V cigarette lighter socket, this routing method is usually sufficient. However, if you want to enable parking mode—which allows the camera to record incidents while your car is parked—you will need to hardwire the camera to your vehicle's fuse box. This requires a hardwiring kit, which includes a voltage monitor to prevent your car battery from draining completely. Identify an "always-on" fuse (for constant power to enable parking mode) and an "ignition-switched" or "accessory" fuse (to tell the camera when the car is on/off). Using a fuse tap, connect the hardwiring kit to these fuses and ground the black wire to an unpainted metal bolt in the vehicle's frame.
An emerging alternative in 2026 is the use of OBD-II port power adapters. These plug directly into your car's diagnostic port, usually located under the dashboard, and can provide both constant and switched power without needing to tap fuses. They are a user-friendly middle ground between the cigarette lighter and a full hardwire. Whichever method you choose, secure any excess cable length with zip ties away from pedals, moving parts, or hot surfaces like the steering column. The final result should be a dash cam that appears to be powered magically, with no visible wires to distract you or attract thieves.
Configuration and Essential Settings
With the camera physically installed, proper configuration is what transforms it from a simple recorder into an intelligent security device. Begin by formatting the memory card inside the camera itself, not on your computer. This ensures the card is optimized for the dash cam's file system. Invest in a high-endurance microSD card designed for continuous writing and rewriting; standard cards can fail prematurely under the constant strain of dash cam use. Set the loop recording duration to a medium interval, like 3 or 5 minutes; this breaks footage into manageable files that are easier to review and save.
Adjust the video settings for your typical driving conditions. Set the resolution to the highest available (e.g., 1440p or 4K) for front footage, as this provides the detail needed to read license plates. Frame rate is also important; 30fps is standard, but 60fps can provide smoother slow-motion playback for analyzing collisions. Enable features like WDR (Wide Dynamic Range) or HDR to balance exposure in high-contrast situations, like exiting a tunnel. For night driving, ensure night mode is on, but understand its limits—no dash cam sees perfectly in the dark, so proper positioning to avoid glare is still paramount.
Activate the G-sensor and motion detection judiciously. The G-sensor detects impacts and should be set to a medium sensitivity to lock important event files without filling the card with locked clips from potholes. Parking mode motion detection should be set to capture events when the car is off. Finally, set the correct date, time, and time zone. This metadata is crucial evidence. Many modern dash cams now use GPS for automatic time syncing and to embed your speed and location into the video, which can be vital for insurance claims. Take the time to connect the camera to its app to familiarize yourself with the playback and download process before you actually need it.
Testing, Maintenance, and Legal Savvy
Your installation is not complete until it has been thoroughly tested. Take your car for a short drive in varied conditions—daylight, shadows, and if possible, at night. Review the footage to check for glare, proper focus, and that the camera is capturing the intended field of view. Verify that the G-sensor locks files upon a firm tap on the dashboard and that parking mode activates correctly when you turn the car off. Test the Wi-Fi or app connectivity to ensure you can easily access footage. This proactive testing prevents the devastating realization that your camera wasn't working after an incident.
Ongoing maintenance is minimal but essential. Periodically, perhaps once a month, wipe the camera lens with a soft cloth to remove dust and fingerprints that can degrade video quality. Check the memory card's health by reviewing a random clip every few weeks to ensure it’s recording properly. Most high-endurance cards are rated for thousands of hours, but it’s wise to replace the card every 12-18 months as a preventative measure, as constant writing wears it out. Also, inspect the adhesive mount annually, especially in climates with extreme heat or cold, to ensure it hasn’t loosened.
Finally, operate your dash cam with legal and ethical awareness. While the footage is invaluable for insurance, be mindful of privacy. Informing passengers they are being recorded, especially if audio is captured, is a courteous and often legally required practice. Understand that while you own the footage, sharing it publicly online, particularly involving identifiable people or minor incidents, can have legal repercussions. In the event of an accident, you are generally not obligated to immediately volunteer the footage to the other party, but you must provide it to your insurance company and law enforcement if subpoenaed. Your dash cam is a powerful tool, and with proper installation and responsible use, it serves as your most reliable co-pilot.
Key Takeaways
- ✓ Strategic placement behind the rearview mirror on the passenger side provides an optimal, unobstructed view of the road while minimizing driver distraction.
- ✓ A professional installation requires meticulously hiding wires by tucking them into the headliner and A-pillar trim, avoiding airbag deployment zones for safety.
- ✓ Hardwiring to the fuse box with a dedicated kit is essential for enabling parking mode features without risking a dead car battery.
- ✓ Proper configuration—including high resolution, loop recording, G-sensor sensitivity, and correct time/date—is crucial for the dash cam to function as effective evidence.
- ✓ Regular maintenance, such as cleaning the lens and periodically replacing the high-endurance microSD card, ensures long-term reliability and video quality.
Frequently Asked Questions
Can I install a dash cam myself, or should I hire a professional?
Most single-channel (front-only) dash cams are designed for DIY installation. With basic tools, patience, and following a guide like this, a clean and functional setup is very achievable. However, if you are uncomfortable with vehicle trim, electrical systems, or are installing a complex multi-channel system with parking mode, a professional installer can ensure a safe and flawless job, often for a reasonable fee.
Will installing a dash cam drain my car battery?
Not if installed correctly. If you use the included cigarette lighter plug, the camera only powers on when the car is on. If you hardwire for parking mode, the included voltage monitor in the hardwiring kit is designed to cut power before your battery drains to a level that prevents starting. It’s critical to set the voltage cutoff appropriate for your vehicle (usually 12.4V or 12.2V).
What size and type of memory card do I need?
You need a high-endurance or surveillance-grade microSD card, typically in sizes from 64GB to 256GB. Standard cards from a phone or camera are not built for the constant read/write cycles and will fail quickly. Brands like SanDisk High Endurance, Samsung PRO Endurance, or Kingston Canvas Go! Plus are reliable choices. Format the card in the camera first.
Is it legal to record audio with my dash cam?
Laws vary significantly. In many places, "one-party consent" laws apply, meaning you can record a conversation you are a part of. However, some states and countries require all-party consent. It’s safest to research your local laws. Many dash cams allow you to disable audio recording in the settings, which can simplify legal compliance and passenger privacy.
How do I save a video if I get into an accident?
Most dash cams will automatically lock the current video file upon a G-sensor impact detection. You should also manually lock the file by pressing the emergency button (often marked with a red exclamation point) on the camera or via the app. To preserve it, immediately remove the memory card and copy the file to your computer, or use the app to download the file to your phone before loop recording overwrites it.
Conclusion
Installing a dash cam is more than just sticking a device to your windshield; it is a systematic process of planning, precise placement, discreet wiring, and intelligent configuration. From choosing the right spot behind the mirror to hiding wires for a clean look, and from setting up parking mode to understanding the legal landscape, each step contributes to creating a reliable digital witness. When done correctly, the dash cam becomes an integrated, unobtrusive part of your vehicle that operates seamlessly in the background, ready to provide crucial evidence and peace of mind.
Now that you possess the knowledge, take action. Review your dash cam’s manual, gather your tools, and block out an hour or two to complete the installation with confidence. The road is unpredictable, but your preparedness doesn’t have to be. A properly installed dash cam is a small investment of time that offers immense protection, ensuring that no matter what lies around the next bend, you have an unbiased account of the journey.

Tony Kilmer is an auto mechanic and the author behind CarTruckAdvisor.com. He shares practical, no-nonsense guidance on car and truck maintenance, common problems, and repair decisions—helping drivers understand what’s going on and what to do next.