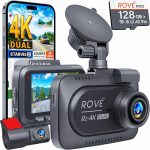
You have just unboxed your new dash cam, and the first thing you notice is that dangling power cord snaking across your windshield and down to the cigarette lighter. It is an eyesore, a potential distraction, and a constant reminder that your installation is only half-finished. The question that immediately comes to mind is whether you should take the more permanent step of hardwiring device directly into your vehicle’s electrical systemThis decision is about more than just aesthetics. In 2026, with dash cams becoming standard equipment for millions of drivers, understanding the trade-offs between a simple plug-in setup and a professional hardwire installation is critical for your safety, your camera’s performance, and your car’s battery health. This guide will walk you through every factor you need to consider, from the technical requirements and legal implications to the step-by-step process and long-term maintenance, so you can make an informed choice that fits your driving habits and technical comfort level.
Understanding the Core Difference: Cigarette Lighter vs. Hardwire
The most fundamental distinction between these two power methods lies in how they connect to your vehicle’s electrical system. A cigarette lighter adapter, also known as a 12V accessory port, is a simple plug-and-play solution. It draws power from the car’s auxiliary circuit, which is typically switched on and off with the ignition. This means your dash cam will automatically turn on when you start the car and shut off when you turn the engine off. The installation is straightforward: you plug it in, route the cable along the headliner and A-pillar, and you are done. However, this method leaves a visible cord and occupies your only 12V port, which might be needed for charging a phone or powering other devices.
Hardwiring, on the other hand, involves connecting your dash cam directly to your vehicle’s fuse box using a special hardwire kit. This kit typically includes a fuse tap, a voltage regulator, and a ground wire. The primary advantage is a completely hidden installation. The power cable runs from the camera, tucks neatly behind the headliner, down the A-pillar, and into the fuse box, leaving no visible wires. More importantly, a hardwire connection allows you to choose which fuse circuit to tap into. You can select an “always-on” circuit for parking mode surveillance, or a “switched” circuit that only powers the camera when the ignition is on, mimicking the behavior of the cigarette lighter but with a much cleaner look.
The third critical component of a hardwire kit is the voltage cutoff feature. Modern hardwire kits include a small box that monitors your car’s battery voltage. If the voltage drops below a certain threshold, typically around 11.8 to 12.0 volts, the kit automatically cuts power to the dash cam. This prevents the camera from draining your car’s starter battery overnight, a risk that does not exist with a standard cigarette lighter connection since that port is usually dead when the car is off. This voltage protection is the single most important safety feature that makes hardwiring a viable option for parking mode.
The Case for Hardwiring: Parking Mode, Aesthetics, and Reliability
The Risks and Challenges: Battery Drain, Complexity, and Warranty
Despite its advantages, hardw is not without significant risks. The most common concern is battery drain. Even with a voltage cutoff, a dash cam in parking mode consumes power. If you drive infrequently or only take short trips, your car’s alternator may not have enough time to recharge the battery between parking sessions. Over several days, this can lead to a dead battery, especially in cold weather when battery capacity is already reduced. To mitigate this, you must choose a hardwire kit with an adjustable voltage cutoff and set it to a safe level for your specific vehicle. Some premium kits even offer a timer-based cutoff, allowing you to set the camera to run for only a few hours after parking.
The installation process itself is a challenge for many car owners. Accessing the fuse box often requires removing trim panels, which can be brittle and prone to breaking, especially in older vehicles. You must correctly identify which fuse to tap, using a multimeter to test for always-on or switched circuits. A mistake here can blow a fuse, damage the camera, or even cause a short circuit. Furthermore, routing the cable near the side curtain airbags is a critical safety concern. The cable must be tucked behind the airbag, not in front of it, to ensure the airbag can deploy properly. Incorrect routing can turn your dash cam cable into a dangerous projectile during a collision.
Finally, there is the question of your vehicle’s warranty. While hardwiring itself is unlikely to void a full vehicle warranty, it can create complications. If you tap into a critical circuit and cause electrical damage, the dealership may deny a warranty claim for that specific issue. Some manufacturers are becoming more sensitive to aftermarket electrical modifications, particularly in newer vehicles with complex computer systems. Additionally, if you lease your vehicle, you may be required to return it to its original condition, which means removing the hardwire kit and repairing any damage to trim panels. For these reasons, many drivers opt for professional installation, which adds cost but provides peace of mind and a warranty on the work itself.
Step-by-Step Guide How to Hardwire Your Dash Cam Safely
If you decide to proceed with hardwiring, the process follows a logical sequence that prioritizes safety. First, gather your tools: a hardwire kit specific to your dash cam model, a fuse tap in the correct size (mini, micro, or low-profile), a multimeter, a trim removal tool set, zip ties, and electrical tape. Never use a generic hardwire kit without verifying it matches your camera’s voltage and connector type. Begin by locating your vehicle’s interior fuse box, which is usually under the dashboard on the driver’s side or inside the glove box. Consult your owner’s manual for the exact location and a diagram of the fuses.
Next, use your multimeter to identify the correct fuse slots. Set the multimeter to DC voltage, touch the negative probe to a metal ground point (like a bolt on the chassis), and use the positive probe to test the small metal contacts on top of each fuse. You are looking for two types of circuits: an “always-on” circuit that shows 12V even with the car off, and a “switched” circuit that only shows 12V when the ignition is on. For parking mode, you will tap the always-on circuit. For basic operation without parking mode, use the switched circuit. the chosen fuse and insert it into the bottom slot of the fuse tap. Then, insert the fuse tap into the empty slot in the fuse box. The hardwire kit’s red wire connects to the fuse tap’s wire lead.
The final step is routing and grounding. Route the hardwire kit’s cable from the fuse box, up the A-pillar, and across the headliner to your dash cam. Use trim tools to gently pry the panels and tuck the cable behind them. Ensure the cable runs behind the side curtain airbag, not in front of it. Secure the cable with zip ties to prevent rattling. Connect the black ground wire to a bare metal bolt on the chassis, scraping away any paint to ensure a solid connection. Finally, plug the hardwire kit into your dash cam, turn on the ignition, and test the camera. Adjust the voltage cutoff on the hardwire kit to 12.0V or 11.8V, depending on your battery’s health and your driving habits.
Alternatives and Professional Installation: When Hardwiring Is Not the Answer
Hardwiring is not the only solution for a clean installation. For drivers who are uncomfortable with electrical work or who lease their vehicles, there are excellent alternatives. The most popular is the “cigarette lighter hardwire” approach, which uses a short, right-angle adapter that plugs into the 12V port and then routes the cable along the dashboard. While not completely invisible, this method avoids the fuse box entirely. Another option is an OBD-II port power cable. These cables plug directly into your car’s diagnostic port, which is always powered. They are incredibly easy to install and often include voltage protection, but they occupy the OBD-II port, which may be needed by mechanics for diagnostics.
For those who want the benefits of hardwiring without the DIY risk, professional installation is a wise investment. A reputable car audio or electronics shop will charge between $100 and $200 for the service, which includes the hardwire kit, labor, and a warranty. They have the experience to handle complex fuse boxes, airbag systems, and trim panels without causing damage. They can also advise on the best fuse circuits for your specific vehicle and dash cam model. This is particularly recommended for luxury cars, electric vehicles, or any car with a start-stop system, where voltage management is more complex.
Finally, consider the future. If you plan to sell or trade your vehicle in the next few years, a professional hardwire installation adds value because it looks factory-installed and is less likely to cause issues. Conversely, a poorly done DIY job can be a red flag for potential buyers. If you are not confident in your ability to complete the installation safely and cleanly, the cost of professional installation is a small price to pay for the reliability and peace of mind that a properly hardwired dash cam provides. Remember, the goal is not just to power your camera, but to do so in a way that enhances your driving experience without introducing new risks.
Key Takeaways
- ✓ Hardwiring enables 24/7 parking mode surveillance, which is impossible with a standard cigarette lighter connection.
- ✓ A voltage cutoff feature in the hardwire kit is essential to prevent draining your car’s starter battery overnight.
- ✓ Professional installation is recommended for complex vehicles, leased cars, or anyone uncomfortable working with automotive electrical systems.
- ✓ The installation process requires careful routing of cables away from side curtain airbags to maintain safety.
- ✓ Alternatives like OBD-II power cables offer a middle ground for those who want a cleaner look without hardwiring.
Conclusion
Deciding whether to hardwire your dash cam comes down to balancing your need for advanced features against your comfort with automotive electrical work. For drivers who want 24/7 parking mode surveillance, a completely hidden installation, and a reliable power source that does not occupy their 12V port, hardwiring is the clear winner. The key is to approach the project with the right tools, a solid understanding of your vehicle’s fuse box, and a healthy respect for safety, particularly regarding airbag deployment and battery drain. The voltage cutoff feature in modern hardwire kits has made this option safer than ever, but it is not a set-it-and-forget-it solution.
If you are not confident in your ability to perform the installation correctly, or if you drive a complex modern vehicle, do not hesitate to seek professional help. The cost of installation is a worthwhile investment in the longevity of your dash cam and the safety of your vehicle., the best installation is the one that you trust to work reliably every time you start your car. Whether you choose the simplicity of a cigarette lighter plug or the sophistication of a hardwire setup, the most important step is to get your dash cam installed and recording. Your future self, reviewing footage of an unexpected incident, will thank for making the effort today.

Tony Kilmer is an auto mechanic and the author behind CarTruckAdvisor.com. He shares practical, no-nonsense guidance on car and truck maintenance, common problems, and repair decisions—helping drivers understand what’s going on and what to do next.