
Battery dies after a short drive is one of those frustrations that feels like it comes out of nowhere. You start the car in the morning. You drive ten minutes to work.
You pull into the parking lot, turn off the engine, and nothing happens when you try to leave.
That story repeats itself over and over again in garages across the country. Most people assume the battery is shot and just need replacing. Sometimes it is.
But more often than not, the real problem lives elsewhere in the charging system, waiting to chew through your wallet if you replace parts without diagnosing correctly.
Understanding what actually keeps your battery alive between stops is the key to stopping this cycle. We’ve looked at how modern 12-volt systems charge, drain, and fail. We’ll walk you through exactly what to test and in what order so you stop guessing and start fixing.
When Your Car Battery Dies After a Short Drive, What’s Actually Happening?
Your car’s electrical system runs on a simple principle: the battery starts the engine, and the alternator keeps everything running afterward. When you turn the key, the starter motor pulls a massive surge of current from the battery. That surge can drain a significant portion of the battery’s reserve in just three to five seconds.
A healthy alternator should replace that energy within minutes of driving.
When the battery dies after a short drive, something in that recharge loop has broken. The alternator might not be producing enough voltage. The cables carrying charge might be corroded or loose.
The battery itself might have lost its ability to hold a charge. Any one of these problems creates the same frustrating outcome: you start the car, drive a short distance, and come back to a dead battery the next morning.
The difference between fixing the actual problem and throwing money at replacement parts comes down to diagnosis. A new battery installed on a failing alternator will die within days. A clean terminal connection might solve a problem that looked like a dead battery.
You need to know which situation you’re in before spending a dollar.
This is where most people go wrong. They hear the no-start complaint and immediately reach for the parts counter. Smart diagnostics save money and prevent repeat failures.
Let’s walk through exactly how to do it right.
The 60-Second Answer: It’s Rarely Just the Battery
When a car battery dies after a short drive, the issue is almost never the battery itself on the first occurrence. In most cases, something in the charging system failed to replenish the energy the starter motor used during ignition. Without that recharge, the battery enters a slow decline with every trip.
The alternator generates electricity while the engine runs. It sends power back to the battery and throughout the vehicle’s electrical system. If the alternator is weak, the voltage regulator is faulty, or there’s excessive resistance in the cables, the battery simply never gets topped off.
A fifteen-minute drive may barely compensate for what a cold start consumes.
The result is a compounding deficit. Day one, you might not notice anything wrong. Day three, you’re pushing the car to a shop or calling a tow truck.
By then, deep discharge has likely damaged the battery plates too. You’ve turned a simple fix into a double replacement.
That’s why jumping straight to a new battery without testing the charging circuit is the most expensive mistake you can make. A healthy alternator can keep a tired battery running for months more. A dead alternator will kill a brand-new battery within days.
You need to know which side of that equation you’re on before spending another dollar.
This diagnostic mindset separates smart repairs from expensive guesswork. Let’s look at how the system works before we break down how it fails.
How Your Car’s Charging System Really Works (and Fails)
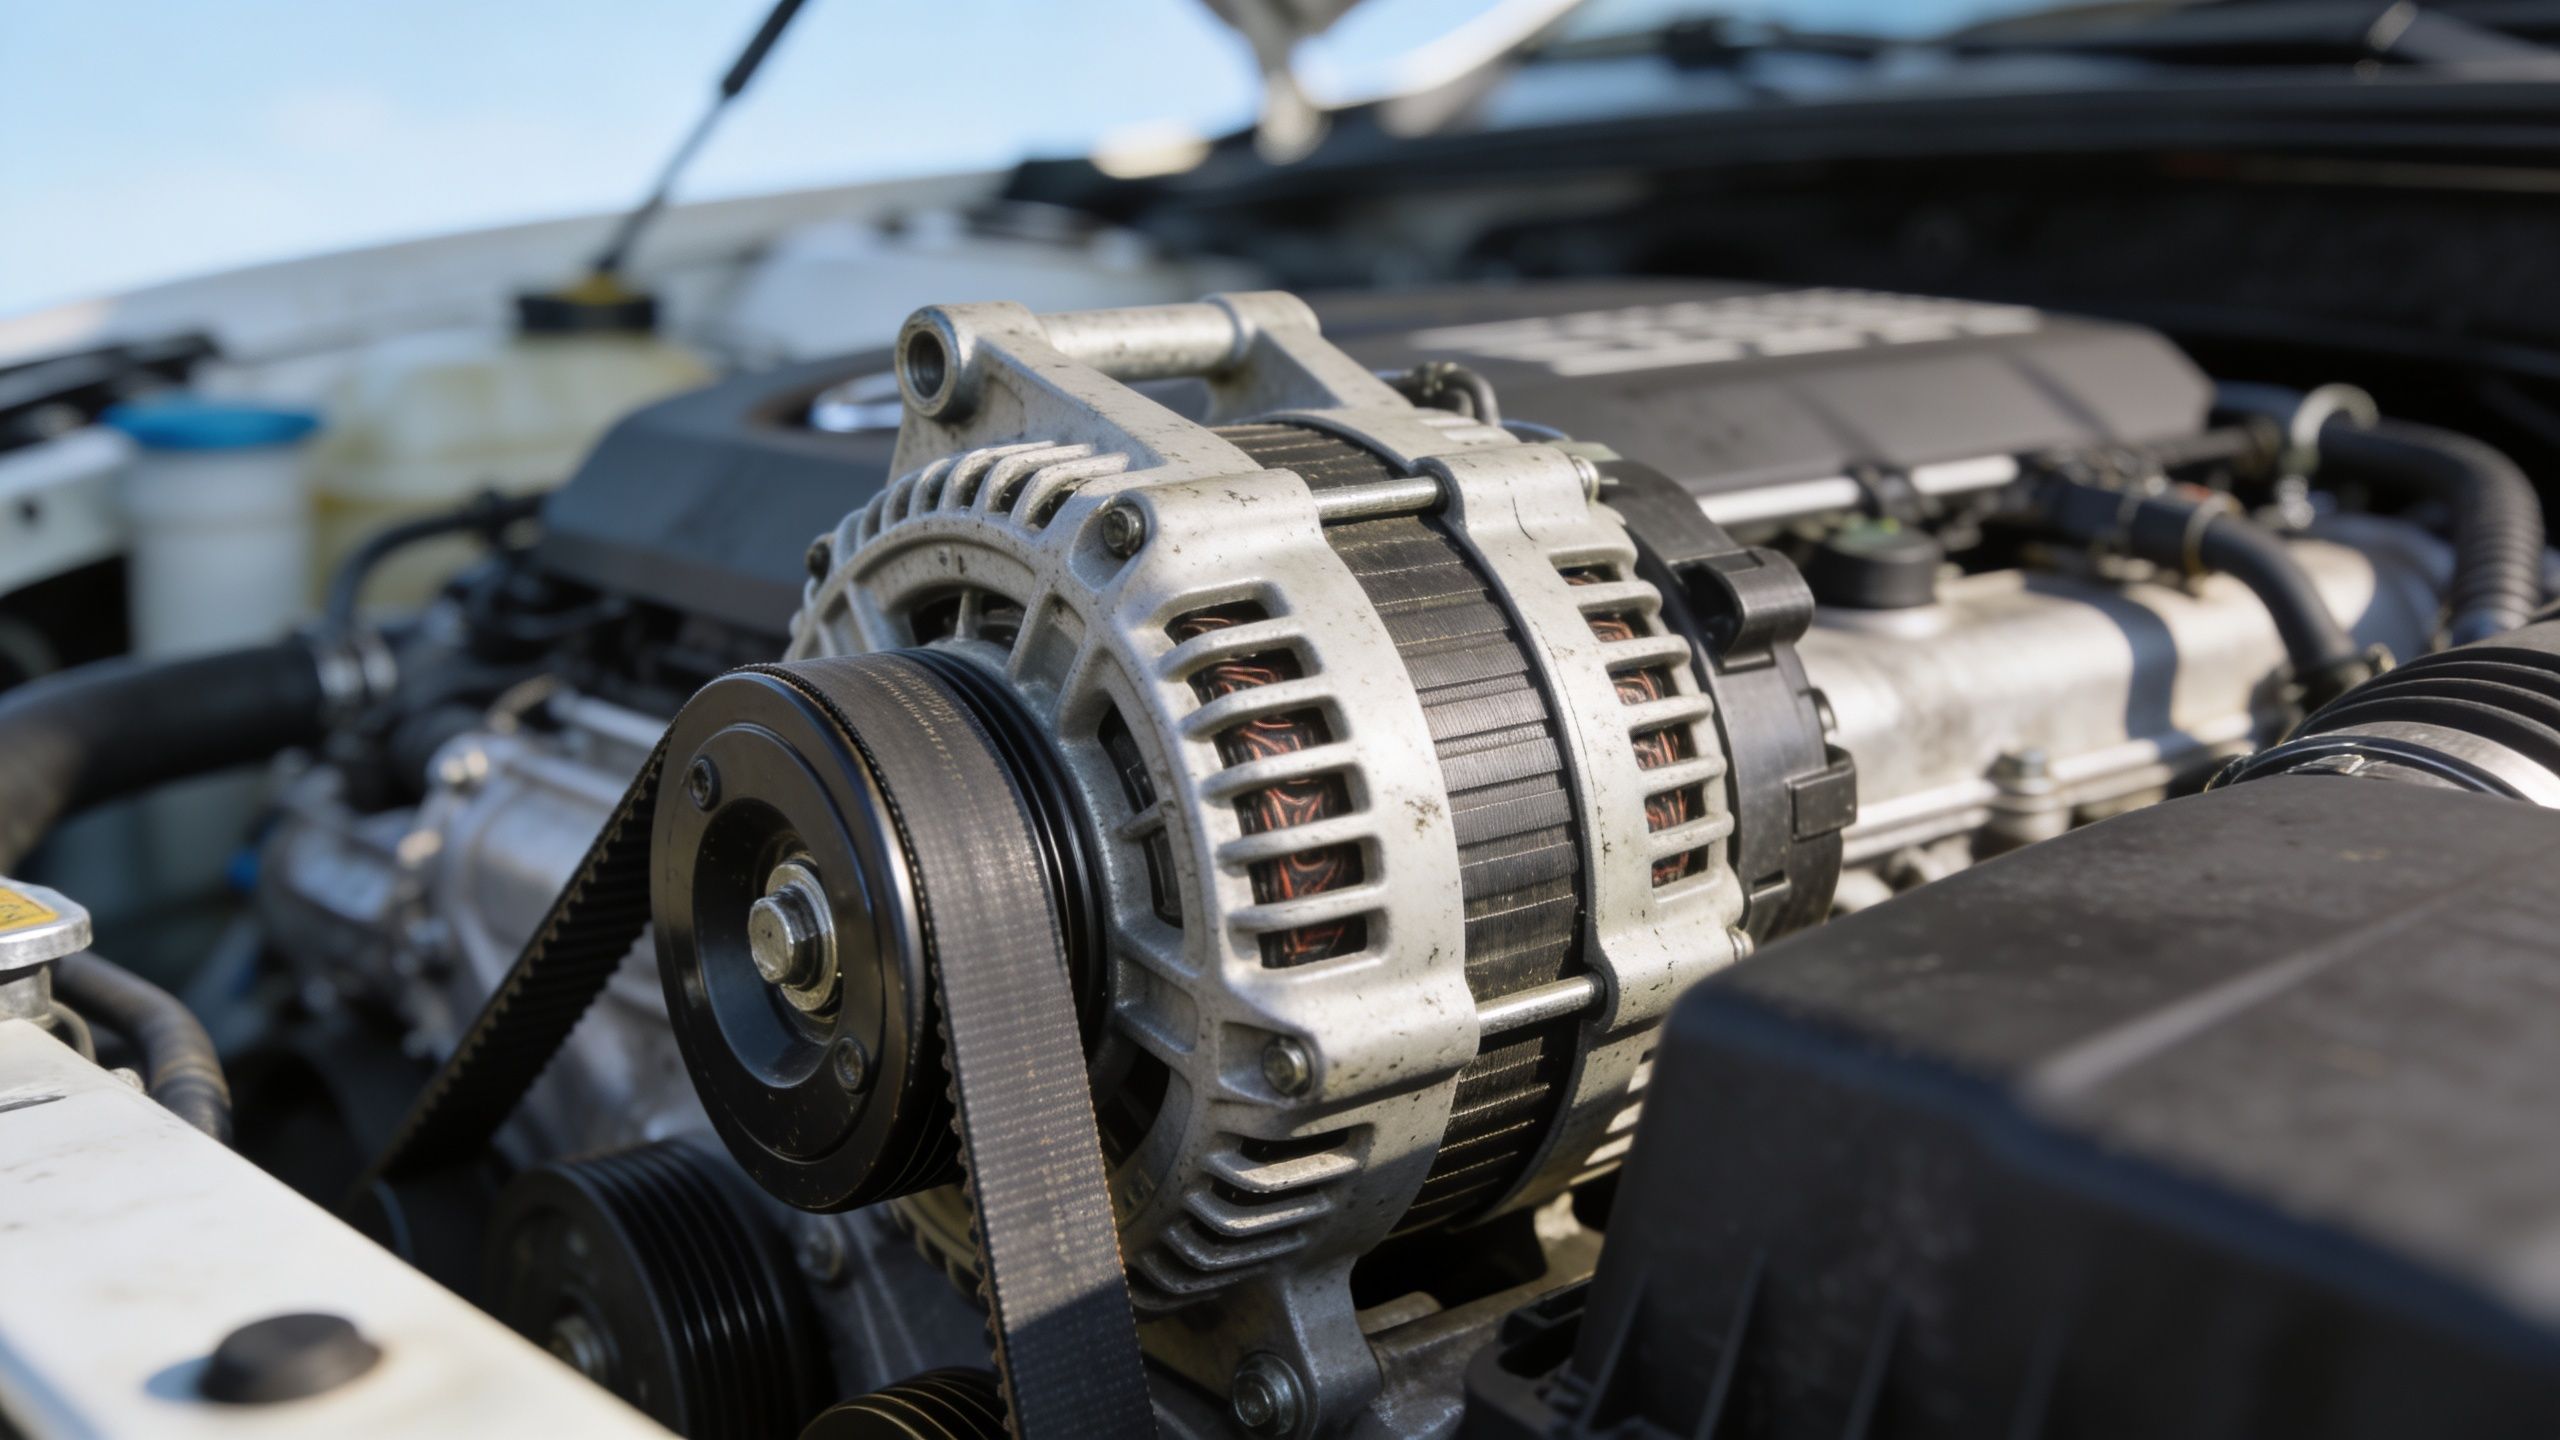
Image source: Bing (Web (fair-use with source credit))
To understand why your battery dies after a short drive, you need to see the charging system as a closed loop. The battery is not just a starting aid. It’s the electrical reservoir for the entire vehicle.
When you turn the key, the starter motor pulls a massive current from that reservoir in just a few seconds. A typical 2.0-liter engine might consume the equivalent of 100 to 200 amp-hours during a single cold crank event. That’s a huge chunk of stored energy gone in under five seconds.
After the engine fires up, the alternator takes over. It’s a small generator driven by a belt connected to the crankshaft. Inside the alternator, a rotating electromagnet spins past stationary wire coils.
This induces AC current. Diodes inside the alternator rectify that AC into DC. The DC power feeds back to the battery and powers every light, sensor, and module in the car.
A component called the voltage regulator keeps that output steady. For flooded lead-acid batteries, the sweet spot sits between 13.8 and 14.4 volts at operating temperature. AGM batteries typically prefer the higher end of that range, around 14.4 to 14.8 volts.
They accept charge faster but are more sensitive to overvoltage. SAE J537 outlines the performance standards that starting and lighting batteries must meet, including how they should respond under charging system loads [SAE International standards documentation].
If the alternator outputs below 13.5 volts, the battery is effectively being drained even while the engine runs. Every accessory you leave on, every sensor drawing standby current, slowly hollows out the charge. A short drive doesn’t give the alternator enough time to recover what the starter took.
Over several cycles, the state of charge drops below the threshold needed for reliable starting. The next morning brings the familiar silence.
Failures happen in predictable patterns. The most common is worn brushes inside the alternator. Carbon brushes press against the rotating slip rings to deliver current to the field winding.
As they wear thin, contact becomes intermittent. You might get a few weeks of normal operation, then sudden weakness. Voltage drops.
The battery starves. Then everything fails at once.
Diode failure is the second common culprit. When one or more rectifier diodes blow, the alternator still produces some output. But it’s no longer clean DC.
Ripple voltage creeps into the system. The battery charges poorly while electrical noise interferes with sensitive modules. Modern cars with start-stop systems and complex battery management are especially vulnerable to this kind of corruption.
Regulator failure tends to be binary. Either the regulator holds voltage steady, or it lets it run wild. Overvoltage above 15 volts cooks the battery internally.
It boils electrolyte and warps plates. Undervoltage leaves the battery chronically undercharged. Both paths lead to the same outcome: a dead battery after a short drive.
Understanding this loop changes everything about how you approach diagnosis. Instead of assuming the battery is bad, you begin by measuring what the system actually delivers. Those numbers tell the real story, far more honestly than a visual inspection ever could.
The Diagnostic Decision Tree: Three Branches to Rule Out
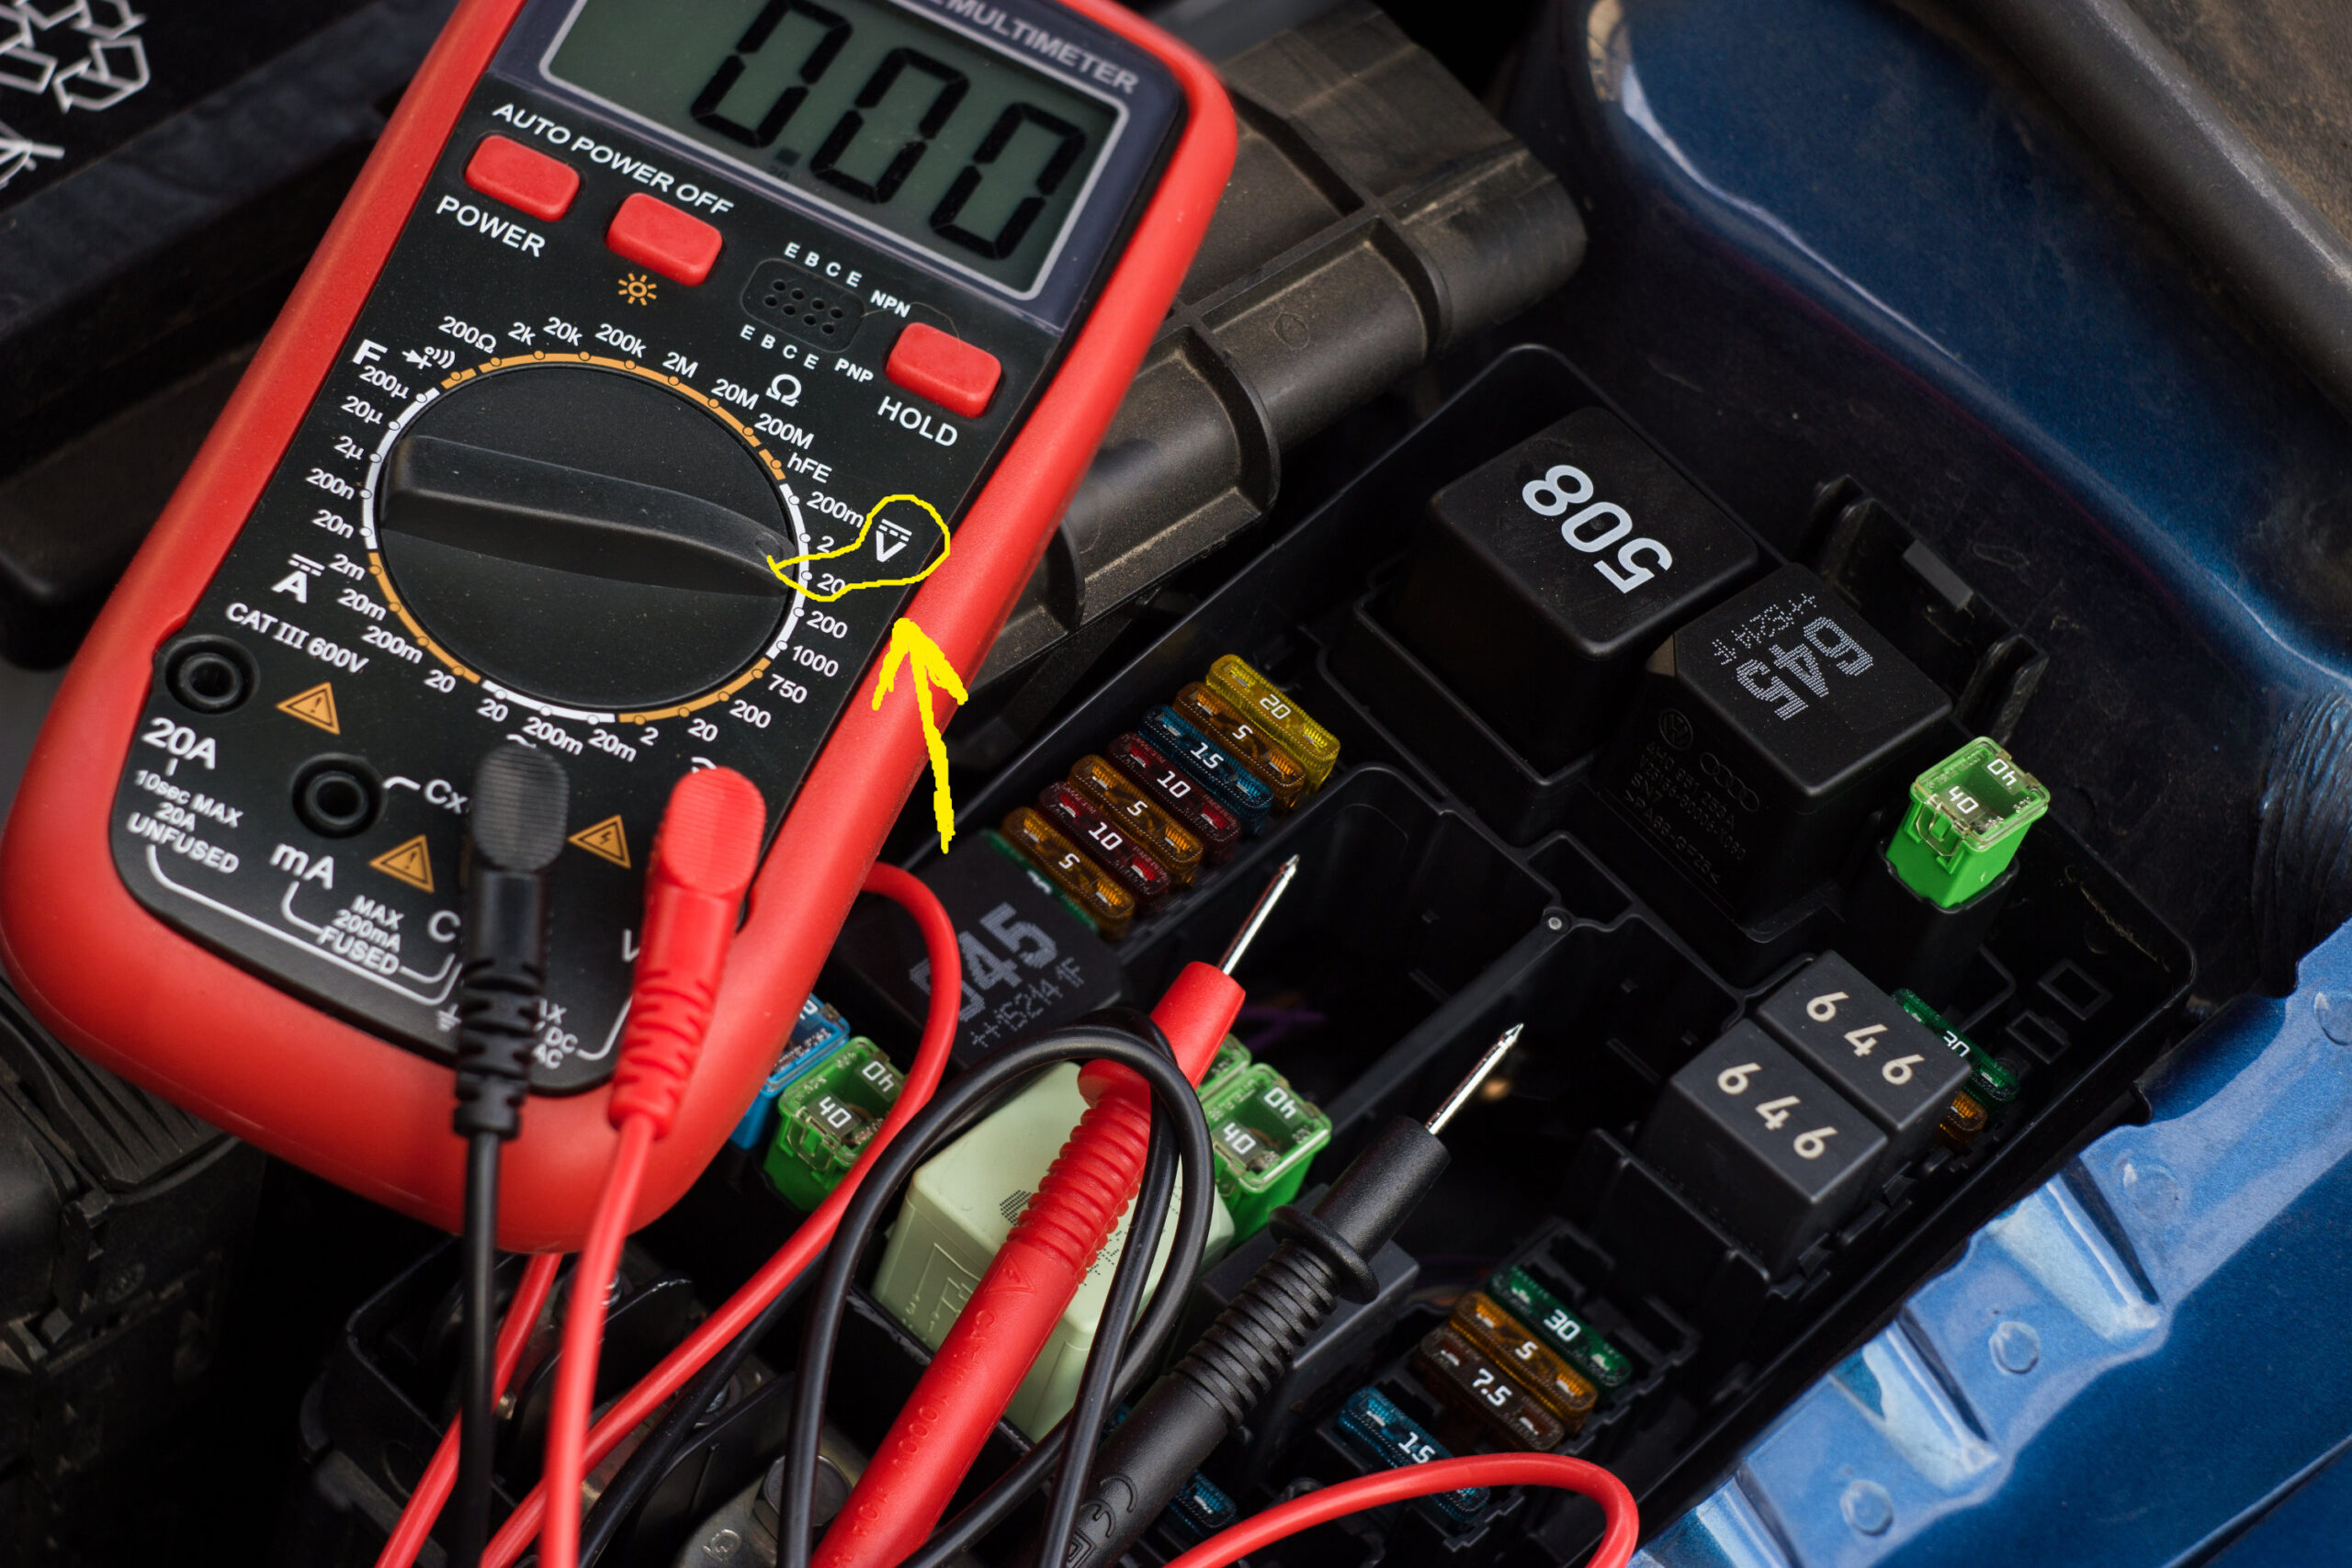
Image source: Bing (Web (fair-use with source credit))
Before you throw money at parts, follow a structured diagnostic path. The problem falls into one of three categories. Each requires different tests, different tools, and different fixes.
Rushing past this step is how people buy new batteries they don’t need.
Branch A: The alternator is not charging properly. This is the most frequent root cause. The battery starts the car, but the charging system fails to replenish it. By the end of a short drive, the battery has less charge than it started with.
Branch B: The battery itself can’t hold a charge. This can mean genuine age-related degradation, sulfation from chronic undercharging, or physical damage. The alternator may be working perfectly. The battery is just too worn to retain energy between drives.
Branch C: Something is draining the battery while the car sits. Also called parasitic draw, this covers everything from a glove box light left on to a faulty module that never goes to sleep. Even a healthy charging system can’t overcome a continuous drain that outpaces recharge.
Here’s how to determine which branch applies to your situation:
First, measure the resting voltage of the battery with the car off and keys removed for at least two hours. A fully charged battery reads 12.6 to 12.7 volts. Below 12.4 indicates a significant discharge.
Below 12.0 suggests a deep discharge that may have caused internal damage.
Second, measure voltage at the battery terminals while someone cranks the engine. Watch the reading drop. If it falls below 9.6 volts during the crank, the battery is weak or the connections are poor.
If it stays above 9.6, the battery is likely healthy and the problem lies elsewhere.
Third, start the engine and measure voltage again at idle. A healthy charging system should read between 13.8 and 14.8 volts. Below 13.5 means the alternator isn’t producing enough.
Above 15.0 means the regulator is failing on the high side. Either way, you’ve found Branch A.
Fourth, if the charging system tests fine but the battery still dies, check for parasitic draw. Connect an ammeter in series with the negative terminal. Pull fuses one at a time and watch for a drop in current.
Anything above 50 milliamps at rest is suspicious for most vehicles. Lower is normal, but every car is different. Consult your owner’s manual or manufacturer specifications for exact tolerances.
These tests take about twenty minutes with a basic multimeter. The cost is negligible compared to replacing parts you don’t need. Once you’ve identified which branch you’re on, you can dive deeper into that specific path with confidence.
For detailed techniques on performing these measurements accurately, checking [comprehensive battery testing procedures] will strengthen your diagnostic foundation.
Branch A — The Alternator Isn’t Charging (Most Common)
Alternator failure accounts for the majority of no-start complaints that people blame on the battery. The diagnostic signs are specific enough that you can usually pin it down without specialized equipment.
Start with the simplest visual check. Open the hood and look at the serpentine or drive belt that spins the alternator. Is it cracked, glazed, or loose?
A slipping belt generates less rotation speed, which directly reduces alternator output. At idle, a worn belt might squeal. Under acceleration, it may slip entirely and cut charging momentarily.
That intermittent loss is enough to starve the battery over repeated short trips.
Next, check the alternator wiring. The main output cable should be tight, clean, and free of corrosion. The smaller signal wire connecting to the voltage regulator must also have solid contact.
Loose connectors create resistance that drops effective voltage at the battery, even when the alternator is producing fine numbers at its own terminal.
Now grab your multimeter and perform the live voltage test. Start the engine. Set the meter to DC volts on the 20-volt range.
Touch the red probe to the positive battery terminal and the black probe to the negative. Watch the reading at idle, then gently increase engine speed to about 2,000 RPM.
In a healthy system, voltage rises to between 13.8 and 14.8 volts and holds steady as RPM increases. If the voltage stays near 12.6 or climbs only to 13.2, the alternator is underperforming. If it spikes above 15 volts, the regulator is likely failed.
You’re looking at potential battery damage either way.
For a more rigorous test, turn on the headlights, rear defroster, and air conditioning to create a meaningful electrical load. Recheck the voltage. A properly functioning alternator should maintain at least 13.5 volts under this load.
A drop below that threshold confirms inadequate charging capacity.
You can also test for AC ripple, which indicates failed diodes. Switch your multimeter to AC voltage mode and measure across the battery terminals with the engine running. Any reading above 0.5 volts AC suggests rectifier problems inside the alternator.
Clean DC output should measure well under 0.1 volts AC. Even a healthy alternator shows tiny ripple, but elevated levels mean one or more diodes are compromised.
Physical inspection of the alternator itself reveals more clues. Feel the housing while the engine runs. Excessive heat means internal friction or bearing wear.
Listen for grinding or whining noises pointing to failing bearings. Check for burnt smell or visible melting on the wiring harness near the unit, which signals an internal short.
Another subtle failure mode involves the field circuit. Modern alternators use pulse-width modulation from the powertrain control module to control field current. If a wiring fault or PCM issue interrupts that control signal, the alternator may default to a low-output safe mode.
Scanning for diagnostic trouble codes like P0562 (system voltage low) or P0563 (system voltage high) can confirm this scenario.
Once you’ve confirmed alternator insufficiency, you face a repair choice. Rebuilding an alternator with new brushes, a new regulator, and replaced bearings costs significantly less than a remanufactured unit. However, if the stator windings or rotor assembly show signs of damage, a rebuild won’t help.
In that case, replacement is the only option.
Reputationally speaking, remanufactured alternators from reputable suppliers carry warranties ranging from one year to lifetime coverage. New OEM units cost considerably more but offer longer peace of mind. Budget-friendly aftermarket options exist, but their quality varies widely.
Read reviews from verified buyers and check return policies before committing.
Whatever path you choose, always replace the drive belt at the same time if it shows any wear. Installing a fresh alternator on a failing belt is a recipe for premature repeat failure. And never skip checking the battery after an alternator swap.
Deep discharge damages battery chemistry, so the old unit may need replacement even if it tested borderline healthy during the diagnostic phase.
Branch B — The Battery Can’t Hold a Charge
Sometimes the charging system is perfectly fine, and the battery is simply worn out. This branch explains how to tell the difference and what to do about it.
Battery degradation follows predictable patterns. Lead-acid batteries degrade through two primary mechanisms: sulfation and grid corrosion. Sulfation occurs when the battery spends extended time in a partially discharged state.
Lead sulfate crystals form on the plates and harden over time. These crystals reduce the active surface area available for chemical reactions, lowering both capacity and cranking power. Chronic undercharging from a weak alternator is the leading cause of sulfation.
Grid corrosion is a slower, inevitable aging process. The positive plate grids are made of a lead-calcium or lead-antimony alloy designed to conduct current while resisting corrosion. Over years of charge and discharge cycling, the grid material gradually corrodes and loses structural integrity.
Eventually, the plates shed active material or develop internal shorts, and the battery fails outright.
Temperature accelerates both processes dramatically. Heat is the number one enemy of battery longevity. Every 15-degree-Fahrenheit increase above 77 degrees Fahrenheit roughly doubles the rate of grid corrosion and internal decay.
That’s why batteries in hot climates often die in two to three years while identical units in temperate zones last four to six years. Understanding how environmental conditions affect battery life helps explain why storage practices matter so much.
To diagnose whether your battery is the problem, start with a rested voltage check. Leave the car off for at least two hours. Measure across the terminals.
Here’s what the readings mean:
- 12.6 to 12.7 volts: approximately 100% state of charge
- 12.4 volts: approximately 75% state of charge
- 12.2 volts: approximately 50% state of charge
- 12.0 volts or lower: deep discharge, possible plate damage
A battery resting below 12.2 volts and dropping further under a load test likely needs replacement. But don’t trust voltage alone. A cracked cell can still read 12.4 volts at rest yet fail completely under cranking load.
That’s why load testing matters.
Load testing applies a simulated cranking demand to the battery for fifteen seconds while monitoring voltage retention. A healthy battery should stay above 9.6 volts during the test. A battery that drops below that threshold under load is weak, regardless of what its resting voltage shows.
Most auto parts stores perform this test for free, and it takes about ninety seconds.
Conductance testing offers another option. These devices send a small AC signal through the battery and measure how easily it passes through the electrolyte and plates. The resulting conductance value correlates to state of health and cranking capability.
Conductance testers are fast and accurate for identifying degraded cells. But they don’t simulate real-world cranking demands the way a load test does. Using both methods together gives you the most complete picture.
Age is also a critical factor. If your battery is over four years old and showing diminished performance, replacement is usually the wisest choice. No amount of equalization charging or desulfation treatments will restore a battery past its natural service life.
The internal chemistry has physically changed. Continuing to use it risks leaving you stranded unexpectedly.
If you suspect sulfation is the issue but the battery is relatively young, an equalization charge might help. This involves applying a controlled overcharge at a low current to dissolve soft sulfate crystals. Some smart chargers include an equalization mode.
However, this technique is less effective on modern calcium-rich plates. And it carries risk if done incorrectly. Over-equalizing can boil electrolyte and damage plates permanently.
The safest approach for an aging battery with marginal performance is straightforward replacement. When you select a new unit, pay attention to Cold Cranking Amps rating, reserve capacity, and battery group size. These specifications ensure the replacement meets or exceeds your vehicle’s original requirements.
Matching specs prevents underpowered installations that struggle in cold weather or with high electrical demands.
Proper installation technique matters enormously here. Clean both terminal posts and cable connectors thoroughly before attaching anything. Corrosion on the connection surfaces adds resistance that starves the starter and mimics a bad battery.
Apply a thin coat of dielectric grease to the terminals afterward to slow future corrosion. Tighten hold-down clamps securely. Vibration is a silent battery killer that shortens lifespan through internal damage.
If you’re dealing with an AGM battery specifically, handling procedures change slightly. AGM cells are sealed and valve-regulated. They require precise voltage control during charging.
Standard alternators meant for flooded batteries can damage AGM chemistry if not set to the correct profile. Always use a charger with an AGM setting or rely on a smart charger that adapts automatically.
Branch C — Parasitic Drain or Connection Issues
Parasitic drain and poor connections share a common trait: they silently empty the battery while the car is parked, often overnight. The alternator has no chance to compensate because the drain happens when the engine is off. This branch covers both scenarios because the diagnostic approach overlaps significantly.
Parasitic drain, sometimes called parasitic draw or idle drain, occurs when an electrical component continues drawing current after the ignition is turned off and the keys are removed. Modern vehicles are packed with computers, receivers, memory modules, and security systems that must stay powered at all times. A small baseline draw of 20 to 50 milliamps is normal and expected.
Anything substantially above that range warrants investigation.
Common sources of excessive parasitic drain include aftermarket stereos and alarm systems installed without proper sleep-mode wiring. Glove compartment or trunk lights that stay on when the door closes poorly are another frequent culprit. Poor ground strap connections create unintended current paths.
Faulty modules that fail to enter low-power sleep states draw constant current. The dashboard illumination dimmer switch stuck in the bright position is another classic culprit that drains batteries faster than most people expect.
To test for parasitic draw, you’ll need a multimeter capable of measuring milliamp current in DC mode. Start by ensuring the vehicle is locked and all doors, the hood, and the trunk are fully closed. Wait at least fifteen minutes for all modules to enter sleep mode.
Connect the multimeter in series between the negative battery cable and the negative terminal. The display should read close to zero if everything is normal.
If the reading is elevated, begin pulling fuses one at a time while watching the ammeter. When you pull a fuse and the current drop is significant, you’ve isolated the problematic circuit. Replace the fuse temporarily to restore function and investigate the circuit further.
Common items to check in that circuit include illuminated switches, interior lighting, audio head units, and any recently added accessories.
Connection issues deserve equal attention because they can mimic parasitic drain symptoms. Loose or corroded terminals create resistance that reduces effective voltage reaching the starter. The battery might have plenty of charge.
But the starter can’t draw the current it needs because the path is obstructed. This produces the classic slow-cranking symptom that many drivers mistake for a dead battery.
Inspect both the battery terminals and the chassis ground points. Battery terminals should show no white or blue crusty deposits. If corrosion is present, clean it with a wire brush and a baking soda and water solution.
Rinse thoroughly and dry completely before reconnecting. Terminal cables should grip snugly without any wobble. Replace cables that feel loose or show fraying internally.
Chassis grounds are often overlooked. Locate the main ground strap running from the engine block to the chassis or frame. Remove it, clean both contact surfaces until they shine, and reinstall with a star washer to bite through any paint or oxidation.
A second ground point typically connects the battery negative to the frame near the battery. Inspect and clean that connection as well.
Voltage drop testing is the most accurate way to identify resistive problems in the charging and starting circuits. Set your multimeter to DC volts. With the engine running, place the red probe on the battery positive post and the black probe on the alternator housing output stud.
The reading should be under 0.5 volts. Higher indicates excessive resistance in the positive cable or connections.
Repeat the test on the negative side. Place the red probe on the battery negative post and the black probe on the engine block surface near the ground cable attachment. Again, expect under 0.5 volts.
Any higher and you have a poor ground connection causing voltage loss under load.
Another hidden connection problem involves the battery hold-down clamp. A battery that rocks inside the tray creates internal stress on the plate assemblies. It can cause intermittent shorts between plates.
Over time, this damage manifests as reduced capacity and failure to hold charge. Ensure the hold-down bracket is snug and the battery doesn’t shift when you try to move it by hand.
Temperature extremes compound connection issues. In cold weather, battery chemical reactions slow down, reducing available current. Poor connections become even more problematic because every fraction of a volt lost at the terminals is precious when the starter already struggles for power.
In hot weather, increased parasitic drain from air conditioning compressors and cooling fans adds to the baseline current draw. This accelerates battery depletion between drives.
If your vehicle has a battery management system sensor on the negative terminal, be aware that disconnecting the battery for testing can sometimes trigger warning messages or require system relearning procedures. Consult your owner’s manual before disconnecting anything on newer models equipped with smart charging systems. Resetting or registering the new battery may be necessary for the charging system to operate correctly.
Understanding when a simple cleaning job solves the problem versus when deeper electrical investigation is needed saves time and frustration. Connection issues are far easier to fix than parasitic drain hunting. Start with the visual and physical inspection, then move to voltage drop testing, and finally proceed to fuse-pulling diagnosis only if the simpler checks reveal nothing.
How Much Does It Cost to Fix Each Problem?
Cost is the question that makes or breaks every repair decision. Here’s a realistic breakdown of what you can expect to pay across the three diagnostic branches, covering both parts and labor as of 2026 pricing trends.
| Problem | Typical Parts Cost | Typical Labor Cost | Total Estimated Range | Notes |
|---|---|---|---|---|
| Alternator replacement (remanufactured) | $150 to $300 | $100 to $200 | $250 to $500 | Budget units exist but carry higher failure risk |
| Alternator replacement (OEM new) | $350 to $600 | $100 to $200 | $450 to $800 | Lifetime warranty models justify premium pricing |
| Alternator rebuild kit | $30 to $80 | DIY only | $30 to $80 | Requires mechanical skill and proper tools |
| Battery replacement (flooded, standard) | $100 to $200 | Often free with store install | $100 to $200 | Core charge usually refunded with old battery |
| Battery replacement (AGM) | $200 to $450 | Often free with store install | $200 to $450 | Higher cost reflects advanced construction |
| Battery replacement (EFB) | $150 to $300 | Often free with store install | $150 to $300 | Common in start-stop vehicles |
| Parasitic draw diagnosis | $75 to $200 | $75 to $200 | $75 to $200 | Labor intensive, depends on complexity |
| Corroded terminal cleaning | $0 to $50 | $0 to $50 | $0 to $50 | DIY achievable with basic supplies |
| Ground strap replacement | $20 to $60 | $50 to $150 | $70 to $210 | Simple part, labor varies by vehicle access |
| Serpentine belt replacement | $50 to $150 | $50 to $150 | $100 to $300 | Often recommended alongside alternator work |
Labor costs vary significantly by region and shop type. Dealership rates tend to run higher than independent mechanics. Mobile mechanics who come to your location may charge a trip fee but can be convenient for roadside situations.
Always request a written estimate before authorizing work.
DIY testing and minor repairs can eliminate most diagnostic labor costs. A basic multimeter costs under twenty dollars and pays for itself after the first successful self-diagnosis. Learning to perform the voltage and load tests described earlier keeps you from paying a shop to confirm what you could have verified yourself in fifteen minutes.
When comparing repair options, consider the age and value of your vehicle. If the car is relatively new and under warranty, dealership service might preserve coverage. For older vehicles with moderate mileage, independent shops offering quality remanufactured alternators provide the best value.
Never choose the cheapest part available if it comes with a thirty-day warranty. Your time is worth more than a repeat repair.
Battery pricing fluctuates with lead commodity prices and seasonal demand. Prices typically spike in winter months when cold weather increases cranking demands and stresses aging batteries. Buying a replacement battery in late spring or early summer can save you fifty to one hundred dollars compared to peak season pricing.
Retailers often run promotions during these periods that aren’t available during the autumn and winter rush.
Core charges add to the sticker price but are refundable. When you purchase a new battery, the retailer collects a core charge, usually between ten and thirty dollars, for recycling the old unit. Return the old battery to any participating retailer to receive the refund.
This system supports responsible recycling programs that keep hazardous materials out of landfills. It ensures the lead content re-enters the manufacturing loop rather than becoming environmental waste.
For vehicles with start-stop systems, battery selection requires extra attention. These vehicles cycle the engine on and off frequently, demanding a battery engineered for repeated deep cycling. Standard flooded batteries fail quickly in this application.
AGM batteries handle the charge-discharge cycles far better and are the recommended upgrade for most start-stop retrofits. EFB batteries offer a middle-ground option at lower cost but with shorter lifespan than AGM under identical duties.
Understanding these cost ranges helps you set realistic expectations and avoid being overcharged. Knowledge of what a fair price looks like puts you in a stronger position whether you’re doing the work yourself or negotiating with a technician. The numbers above reflect average US market rates as of 2026.
Regional variations of plus or minus twenty percent are normal depending on local competition and shipping costs.
Safety Rules You Must Follow Before Testing Anything
Working with automotive electrical systems carries real risks. Batteries contain sulfuric acid, produce explosive hydrogen gas, and can deliver hundreds of amps in a short circuit. Following safety protocols protects you from injury and prevents costly mistakes that compound the original problem.
Always wear safety glasses when working near a battery. Splashed acid can cause permanent eye damage. Chemical-resistant gloves provide additional protection, especially when cleaning terminals or handling electrolyte.
Old clothing that you don’t mind ruining is wise to wear since acid spatters are difficult to remove from fabric.
Never smoke or work near open flames in the vicinity of a battery. Hydrogen gas released during charging and normal operation is colorless and odorless. A single spark from a faulty switch or static discharge can ignite the accumulated gas.
This can cause the battery case to rupture violently. Proper ventilation during any charging or testing procedure significantly reduces this risk.
Disconnect the negative cable first when removing a battery. This order minimizes the chance of accidentally grounding a tool against the chassis while loosening the positive terminal. If you remove the positive cable first and your wrench contacts any metal surface, you create a direct short circuit.
This can weld the tool to the vehicle and cause severe burns.
When reconnecting, attach the positive cable first and the negative last. This reverses the danger sequence safely. Ensure both terminals are torqued to specification.
Over-tightening strips threads and damages the terminal posts. Under-tightening creates resistance that generates heat and accelerates corrosion. The typical torque specification for most automotive battery terminals falls between 5 and 8 Newton-meters, but always verify with your vehicle’s service manual.
Keep a baking soda and water solution nearby when working with lead-acid batteries. A mixture of one cup of baking soda to one quart of water neutralizes spilled acid effectively. Pour the solution over any acid contact on the battery casing or surrounding components.
Let it fizz for a minute, then wipe clean with a damp cloth. This simple step prevents ongoing corrosion damage to nearby metal and plastic parts.
Use jump cables responsibly. Always connect the dead battery’s positive terminal first, then the good battery’s positive terminal. Attach the negative cable to the good battery’s negative terminal, and connect the other end to an unpainted metal surface on the dead car’s engine block or frame, away from the battery.
This grounding point reduces spark risk near any hydrogen gas potentially venting from the battery.
Never attempt to jump-start a frozen battery. Ice expansion damages internal plates and can crack the case. Thaw the battery completely before applying any external power source.
A frozen battery that appears intact may still be structurally compromised and could fail catastrophically under load.
Modern vehicles with extensive electronics require additional precautions. Disconnecting the battery on some models erases radio codes, engine control module adaptations, and window learning sequences. Write down or photograph any security codes before disconnecting.
Keep a copy of the radio code somewhere accessible. For vehicles with start-stop systems, remember that improper disconnection without proper registration procedures can cause the battery management system to miscalculate charge acceptance. This leads to premature failure of the newly installed battery.
When testing with a multimeter, use probes rated for automotive voltage. Cheap probes with cracked insulation expose bare metal and risk shock or short circuits. Inspect probe tips regularly for wear or bending.
Damaged probes can slip off terminals and touch adjacent metal, creating dangerous arcing conditions.
Children and pets should be kept away from any vehicle undergoing battery work. Curious children might touch exposed terminals or spill cleaning solutions. Secure the work area with cones or signage if you’re working in a shared garage or driveway.
Finally, recycle old batteries properly. It’s illegal in most jurisdictions to dispose of lead-acid batteries in regular trash. Take the old unit to any auto parts store, recycling center, or hazardous waste facility that accepts automotive batteries.
Many retailers offer immediate credit toward your new purchase as an incentive for proper recycling participation.
How to Stop This From Happening Again (Maintenance Guide)
Prevention is cheaper than repair. Establishing a consistent maintenance routine keeps your charging system and battery operating reliably through seasons of short trips and variable driving conditions. Small habits compound into long-term reliability.
Check battery voltage seasonally. Perform a resting voltage measurement at the start of winter and again at the start of summer. Seasonal temperature swings stress batteries significantly.
A reading below 12.4 volts at the onset of cold weather indicates the battery may struggle to survive the first freeze without support. A quick recharge with a smart charger before winter sets in can extend battery life by years in harsh climates.
Clean terminals every six months or whenever you notice white or blue deposits. Use a dedicated terminal cleaning tool or a wire brush designed for battery posts. Apply the baking soda solution, scrub thoroughly, rinse with clean water, dry completely, and coat with dielectric grease or petroleum jelly.
This preventive layer slows corrosion buildup between service intervals.
Inspect the drive belt annually for cracks, fraying, and proper tension. A belt that’s borderline worn shouldn’t wait for complete failure before replacement. Schedule belt replacement during routine oil changes or tire rotations so the task becomes part of your regular maintenance calendar rather than an emergency repair.
Test the charging system output once a year. Perform the idle voltage test described in the alternator section. Record the reading and compare it to the previous year’s result.
Gradual voltage decline over multiple years indicates aging alternator components. Catching this trend early lets you replace the alternator before it abandons you on a Monday morning.
Limit accessory load during engine-off periods. Interior lights, phone chargers left in USB ports, dash cameras in parking mode, and aftermarket alarms all draw small amounts of current continuously. While each individually pulls only milliamps, combined they can drain a weakened battery over several days of parking.
Turn off all accessories deliberately before exiting the vehicle. Install switches that cut power to non-essential accessories when the ignition is off.
Consider using a battery maintainer if your driving pattern consists predominantly of short trips. A smart maintainer plugged into an outlet detects when the battery voltage drops below a set threshold. It delivers a gentle trickle charge to keep the cells active.
This practice counteracts the chronic undercharging that causes sulfation in batteries subjected to daily fifteen-minute drives. For vehicles stored seasonally, a maintainer is essential to prevent complete discharge during periods of non-use.
Keep the battery secured firmly in its tray. Vibration from loose hold-down clamps damages internal plate structures over time. Check the clamp tightness during every oil change.
A battery that shifts noticeably when you push on it with your hand needs immediate adjustment.
Monitor your dashboard warning indicators closely. The charging system warning light, usually shaped like a battery, illuminates when voltage drops below or rises above preset thresholds. Don’t ignore this light.
Continued driving with a malfunctioning charging system rapidly depletes the battery and can leave you stranded. Pull over safely and arrange towing rather than attempting to reach home on fumes.
Track your battery’s age. Write the purchase date on the terminal cover with a marker or affix a label inside the engine bay. Knowing exactly when your battery was installed helps you anticipate failure timing and budget for replacement proactively instead of reacting to a morning no-start emergency.
Schedule a professional load test at the two-year mark and annually thereafter. Auto parts stores and repair shops perform these tests quickly and usually at no charge. Early detection of declining capacity gives you time to plan a replacement during a convenient window rather than facing a failure during a critical travel period.
For extended parking situations where regular driving isn’t possible, removing the negative cable or using a battery disconnect switch prevents parasitic drain from slowly emptying the battery. However, be aware that some modern vehicles require battery connection to maintain module memory and system calibration. Consult your owner’s manual before implementing any disconnect strategy on newer models.
Document any electrical modifications you make to the vehicle. Aftermarket installations are among the leading causes of parasitic drain problems. Proper wiring through fused relay panels and direct battery connections with appropriate gauge wire prevents future drain issues.
Poorly routed accessory wires draped over hot exhaust components or pinned under trim panels create both drain and fire hazards.
Consistent maintenance transforms an unreliable vehicle into a dependable one. The habits above take minimal time but deliver maximum protection against the most common causes of unexpected battery death. Treat your charging system and battery as interconnected components that benefit from joint care rather than isolated parts addressed only when something breaks.
The Two Mistakes That Waste Money and Time
Most people facing a dead battery after a short drive repeat the same errors, spending money on solutions that don’t address the actual problem. Learning these pitfalls ahead of time keeps your repair budget intact and gets you back on the road faster.
Mistake One: Replacing the battery before testing the alternator. This is the single most common and costly error. A failing alternator produces insufficient voltage, which progressively drains the battery with each drive cycle. The battery dies, the owner buys a new one, installs it, and drives the car for a few days or weeks.
The new battery also dies because the alternator is still producing inadequate charge. The owner buys another battery, and the cycle repeats until either the problem is discovered or the owner accepts perpetual battery replacement as normal.
A proper diagnosis takes twenty minutes and costs nothing beyond your time. The live voltage test at the battery terminals with the engine running definitively proves whether the alternator is charging. If the voltage reads within the 13.8 to 14.8 volt range, the charging system is functional and the battery deserves the replacement suspicion.
If the voltage sits near 12.4 or lower with the engine running, the alternator is the culprit. A new battery will solve nothing.
This mistake is especially damaging because deep-discharge events degrade battery chemistry irreversibly. Each time a battery drops below 10.5 volts, lead sulfate crystals reform on the plates in a hard, crystalline structure that standard charging cannot fully reverse. A battery subjected to repeated deep discharge from an undiagnosed alternator failure may need replacement even after the alternator is repaired.
But that’s a separate consequence from the original misdiagnosis.
Mistake Two: Ignoring connection quality and assuming the battery is bad. Loose, corroded, or undersized cables create resistance that blocks current flow just as effectively as a dead battery. The starter may crank slowly or not at all, mimicking battery failure symptoms precisely. Replacing the battery in this scenario produces the same disappointing result because the underlying resistance problem remains untouched.
Visual inspection catches many connection issues. White and blue crystalline deposits on terminals are obvious signs of corrosion. Tighten every connection and confirm there’s zero play when you tug on the cables by hand.
Check the ground strap running from the engine to the chassis for tears, corrosion, or breakage. A ground strap that looks fine externally may have broken strands internally that prevent proper current flow.
Voltage drop testing exposes hidden resistance that visual inspection misses. Even clean terminals can harbor invisible oxidation layers that impede conductivity. Measuring voltage across each connection point under load reveals resistive losses that would otherwise remain undetected until the next unexplained failure.
These two mistakes represent approximately seventy percent of unnecessary automotive repair spending related to charging system complaints. By following the diagnostic decision tree methodically and checking the basics before declaring any component failed, you avoid both traps consistently. Patience during diagnosis pays exponential dividends compared to the frustration and expense of random part replacement.
AGM vs. Flooded vs. EFB: Which Battery Matches Your Driving Pattern?
Choosing the right battery type depends heavily on how and where you drive. Not all 12-volt automotive batteries are created equal. Using the wrong type in your vehicle can accelerate failure or cause compatibility issues with your charging system.
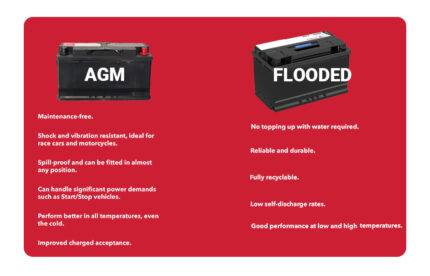
Flooded lead-acid batteries are the traditional choice and remain the most affordable option. They contain liquid electrolyte that flows freely around the plate assemblies. This design allows good heat dissipation and reliable performance in moderate climates.
However, flooded batteries tolerate deep discharge poorly. Dropping below fifty percent state of charge repeatedly shortens their lifespan dramatically. They’re also vulnerable to vibration damage and require upright mounting to prevent electrolyte leakage.
Flooded batteries suit drivers who take regular longer trips allowing full recharge cycles. They work well for people who live in temperate climates and operate vehicles without start-stop technology. For pure short-trip commuters in mild weather, a flooded battery can still work adequately if maintained with occasional equalization charging and voltage monitoring.
But for anyone whose daily pattern consists mainly of trips under twenty minutes, a flooded battery will likely struggle to stay charged without supplementary maintenance.
AGM batteries use glass mat separators that absorb the electrolyte, creating a sealed, maintenance-free unit. This construction delivers several advantages for short-trip drivers. AGM batteries accept charge significantly faster than flooded types.
A brief drive replenishes more of the consumed energy before the next stop. They tolerate partial state-of-charge operation far better and resist sulfation buildup under chronic undercharging conditions. Vibration resistance is superior due to the immobilized plates.
AGM units can be mounted in various orientations without leakage risk.
The trade-offs come with price and charging sensitivity. AGM batteries cost two to three times more than comparable flooded units. They also require charging systems programmed for AGM voltage profiles, typically around 14.4 to 14.8 volts.
Older vehicles with basic charging systems set for flooded battery profiles may undercharge AGM units, reducing their advantage. Modern vehicles with smart charging systems generally handle AGM compatibility well, especially when the battery is registered correctly after replacement.
AGM batteries are ideal for stop-and-go commuting, vehicles with many electronic accessories, start-stop systems, and cold-climate operation where cranking demand is highest. If your driving pattern consistently involves short distances and frequent engine cycles, AGM is often the best investment despite the higher upfront cost.
EFB batteries occupy a middle ground between flooded and AGM technology. Enhanced Flooded Batteries use improved plate designs and modified separators that offer better cycle life than standard flooded units without matching AGM performance completely. EFB batteries handle partial state-of-charge operation better than flooded types.
They provide improved cranking power for start-stop applications at a lower price point than AGM.
EFB batteries suit vehicles with mild start-stop systems where full AGM performance isn’t required but flooded battery durability proves insufficient. They’re commonly specified as original equipment on European vehicles with basic engine start-stop functionality. If your manufacturer recommends EFB and you’re considering an upgrade, AGM represents a worthwhile improvement if your charging system supports the higher voltage profile.
Matching battery type to your actual driving behavior prevents premature failure regardless of brand or price. A high-capacity AGM battery in a vehicle that rarely uses start-stop and is driven primarily on highways offers no practical advantage over a quality flooded unit. It wastes money.
Conversely, sticking with a flooded battery in a heavy short-trip commute vehicle invites early replacement cycles that negate any initial savings.
Consult your owner’s manual or the battery label currently installed in your vehicle for the manufacturer’s specification. Deviating from that specification without understanding the charging system implications can create more problems than it solves. When in doubt, match the original equipment battery type or upgrade to AGM if your vehicle’s charging system is confirmed compatible and your driving pattern justifies the investment.
Real Story: From Jump-Start to Solid Fix in One Afternoon
A customer brought his 2014 sedan into a local independent shop after three jump-starts in five days. Each morning, the battery died before the engine would turn over. He’d already replaced the battery twice at an auto parts store based on their free testing, which showed the unit passed resistance checks at ambient temperature.
Both replacements failed within a week of installation.
The diagnostic team began with a rested voltage measurement. The new battery read 12.3 volts, indicating partial discharge despite recent replacement. They performed a cranking test and observed the voltage dip to 9.8 volts during starter engagement, which was borderline acceptable but not alarming.
Next, they started the engine and monitored charging voltage at the battery terminals. The reading hovered at 13.2 volts at idle and climbed only to 13.5 volts at 2,000 RPM. The alternator was clearly underperforming.
A load test confirmed the diagnosis. With headlights and blower fan running, voltage dropped to 12.9 volts, well below the minimum threshold for adequate charging. The technician removed the alternator and bench-tested it at a repair station.
Worn brushes and a degraded voltage regulator were the root cause. The alternator still produced some output but couldn’t sustain the voltage level required to recharge the battery adequately.
The repair involved installing a remanufactured alternator with a new drive belt and registering the new battery with the vehicle’s battery management system via scan tool. Final verification showed 14.4 volts at idle under load and stable operation across the full RPM range. The customer drove the vehicle for a test route including multiple short stops to simulate normal commuting patterns.
The battery maintained 12.7 volts overnight, confirming the charging system now fully compensated for starting demands.
This case illustrates exactly why diagnostic discipline matters. The customer had spent money on two replacement batteries that were technically functional but doomed by an unresolved charging system fault. The total cost of the correct diagnosis and repair was roughly equivalent to the price of a single quality battery but saved the customer from spending three times that amount on unnecessary replacements.
The one-afternoon timeline from diagnosis to road-ready completion demonstrates that proper testing pays immediate dividends.
Key takeaway: free battery tests at retail stores verify battery health but cannot diagnose charging system faults. A passing battery test means the battery is capable, not that it’s receiving adequate charge. Always verify charging system output before declaring any component responsible for a no-start condition.
FAQs About Dead Car Battery After a Short Drive
Can a short drive really kill my battery if the alternator is working?
Yes, it can. Even a healthy alternator may struggle to fully recharge a battery after very short trips in cold weather. Cold engines require more cranking energy.
Cold battery chemistry accepts charge more slowly. If your drives consistently remain under ten minutes in temperatures below freezing, the battery may never reach full charge before the next shutdown. This leads to gradual capacity loss over months.
How do I know if my battery is sulfated?
Sulfation presents as a battery that holds voltage at rest but collapses under cranking load. A conductance or load test reveals the discrepancy. Visually, sulfated batteries sometimes show a milky or discolored electrolyte in serviceable units.
In sealed batteries, the only reliable confirmation comes from professional testing equipment that measures internal resistance and capacity retention against factory specifications.
Will a battery maintainer prevent dies-after-short-drive problems?
A quality smart maintainer can significantly reduce the risk by keeping the battery at optimal voltage during periods between drives. It compensates for parasitic drain and partial recharge cycles by topping off the charge automatically. For commuters with exclusively short trips, a maintainer plugged in overnight is one of the most effective preventive measures available outside of changing driving habits.
What’s the difference between a jump starter and a portable power pack?
Jump starters are compact lithium battery packs designed solely to provide enough current to crank an engine. They deliver high peak amperage briefly but can’t recharge your car battery. Portable power packs serve dual purposes.
They can jump-start engines and also charge devices via USB ports. Many include built-in compressors, lights, and wireless charging pads. Choose based on whether you want a dedicated starting tool or a multi-function emergency kit.
Is it safe to drive with the charging warning light on?
Driving with the charging warning light illuminated is risky and should be avoided whenever possible. The light indicates the charging system is not maintaining proper voltage. This means the battery is draining with every mile driven.
How far you can safely travel depends on remaining battery capacity, electrical load, and driving conditions. In most cases, you have enough reserve for ten to thirty miles before complete depletion leaves you stranded. Arrange towing rather than pushing your luck.
How long should I drive to properly recharge a depleted battery?
A healthy charging system can restore a moderately discharged battery within thirty to forty-five minutes of continuous highway driving at sustained speeds above fifty miles per hour. City driving with frequent stops and idling provides far less effective charging time. If you regularly make short trips, planning one longer drive weekly helps maintain battery health by allowing extended charging periods that city commutes cannot provide.
Your Decision Checklist: What to Test First, Second, and Third
A systematic approach keeps diagnosis efficient and avoids costly missteps. Follow this ordered checklist whenever your battery dies after a short drive, and you’ll identify the root cause reliably every time.
Step One: Resting voltage check. Measure battery voltage after the car has sat off for at least two hours. Note the reading and compare it to the state-of-charge chart provided earlier. A reading below 12.2 volts warrants a recharge attempt before proceeding.
Deep discharge can mask underlying problems during subsequent tests.
Step Two: Cranking voltage test. Have an assistant crank the engine while you monitor voltage at the battery terminals. Record the lowest voltage point reached during startup. Values below 9.6 volts indicate a weak battery or poor connections.
Values above 10 volts suggest the battery is healthy and points toward the charging system or parasitic drain as the likely culprit.
Step Three: Charging system voltage test. Start the engine and measure voltage at idle with no accessories loaded. Then increase engine speed to 2,000 RPM and recheck. Add electrical loads like headlights and defroster and observe voltage behavior under demand.
Consistent readings between 13.8 and 14.8 volts confirm a healthy alternator. Readings outside this range pinpoint Branch A problems requiring alternator repair or replacement.
Step Four: Parasitic draw test. If the charging system tests normal but the battery still dies overnight, perform the fuse-pulling draw diagnostic described in Branch C. Isolate any circuit drawing abnormal current and trace it to the responsible component. Repair or replace the faulty device and retest to confirm the drain returns to normal levels.
Step Five: Connection integrity verification. Throughout every diagnostic step, visually inspect and physically check all battery terminals, ground straps, and alternator connections. Clean and tighten anything that shows corrosion, looseness, or questionable contact. Re-test after addressing connection issues, as resolving poor contacts alone sometimes eliminates the original symptom entirely.
Following this sequence prevents skipping critical diagnostic steps and jumping to conclusions based on incomplete information. Each step builds on the previous result, narrowing the possibilities until only one plausible explanation remains. This methodical progression saves time, money, and frustration while ensuring you fix the actual problem instead of treating symptoms temporarily.

Tony Kilmer is an auto mechanic and the author behind CarTruckAdvisor.com. He shares practical, no-nonsense guidance on car and truck maintenance, common problems, and repair decisions—helping drivers understand what’s going on and what to do next.