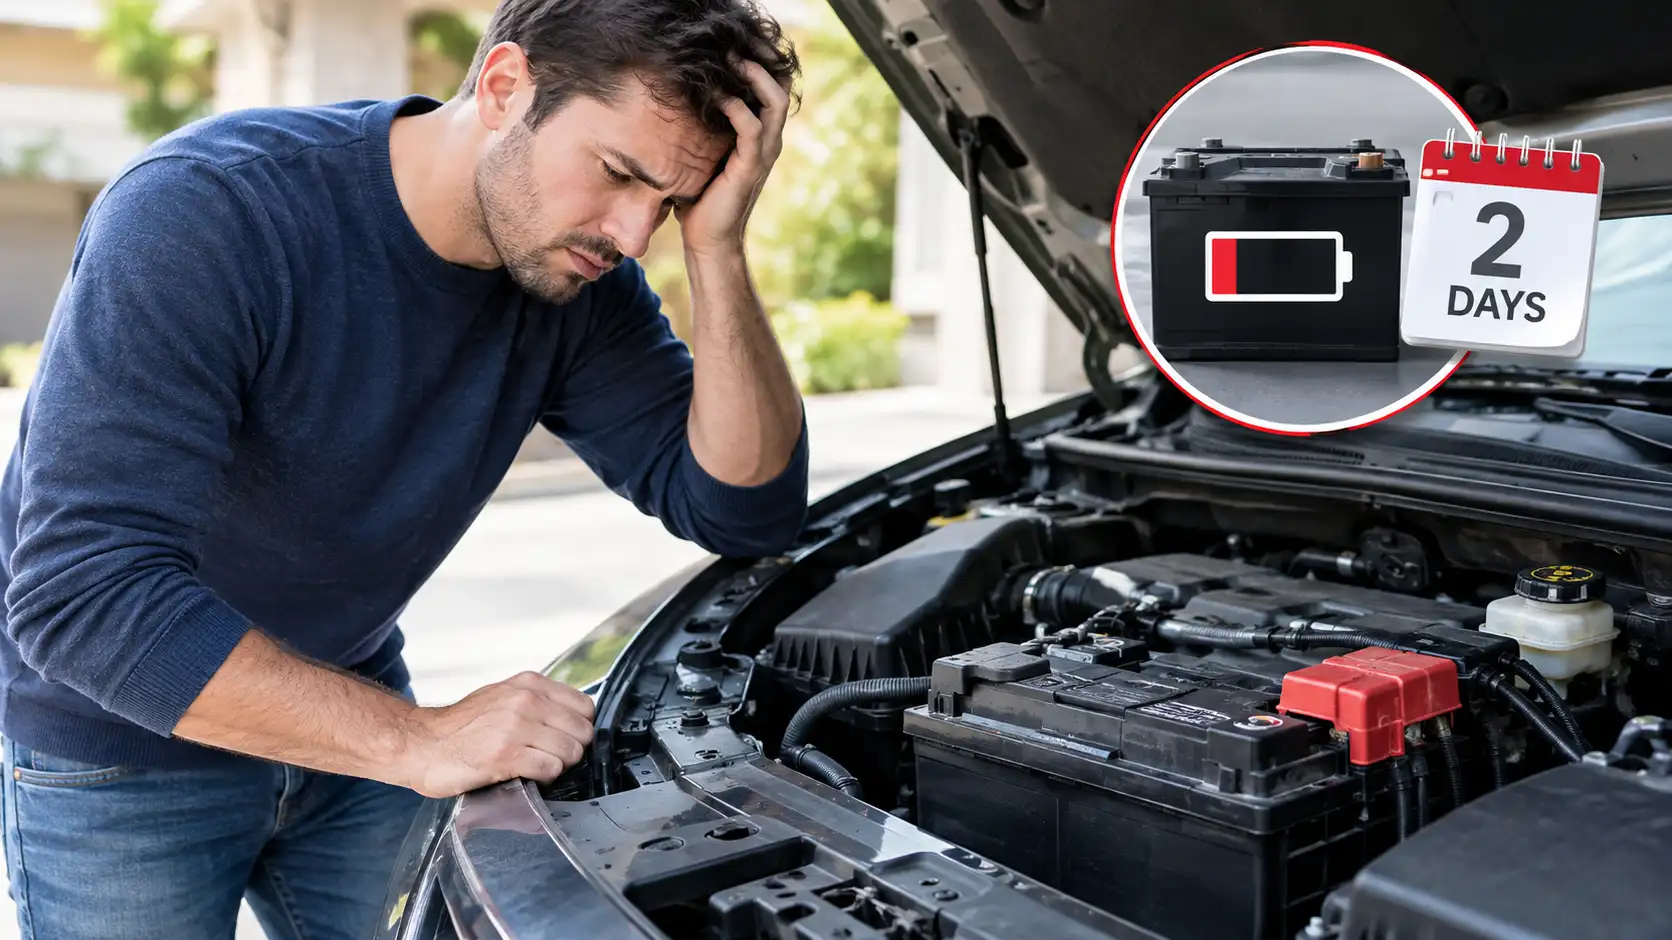
If the problem is a Battery Dies After Sitting for 2 Days, your first instinct may be to blame the battery. A dead cell, a module that never sleeps, or a charging fault can all produce the same silent morning.
Manufacturer specifications and SAE's parasitic-current procedure show why measurement matters. A typical fully charged 12-volt battery rests near 12.6 volts, while many vehicles target less than 50 milliamps after sleep. Work through the tests below before buying another battery.
That sequence keeps a good battery out of the landfill.
Quick Answer
A Battery Dies After Sitting for 2 Days is rarely a mystery. Parasitic drain, weak capacity, or poor charging are common causes. Test voltage and current before replacing the battery.
This workflow saves money and guesswork. Measurements expose the real fault.
Why Your Battery Dies After Sitting for 2 Days
A 12-volt automotive battery stores chemical energy and releases it in large bursts to crank the engine. It also supplies power when the engine is off. A healthy battery should not lose enough charge in two days to fail by itself.
That is the first clue. A two-day failure usually points to one of three problems:
- The battery already has weak capacity.
- Something is drawing current while the vehicle is parked.
- The charging system failed to restore the battery afterward.
Resting voltage tells you the battery's approximate state of charge. It does not prove that the battery can still crank the engine. A battery can display 12.6 volts after sitting and still fail a load test.
Weak plates may collapse under starter current even though the meter looks reassuring.
| What You Notice | What It Often Means | Next Diagnostic Branch |
|---|---|---|
| Dash is dark and quiet | Battery is deeply discharged | Check charging system and stored charge |
| Lights brighten, then click | Voltage collapses under starter load | Perform battery load test |
| Dashboard works normally, but engine will not crank | Starter, fuse, connection, or control fault | Inspect terminals and starter circuit |
| Battery is hot, swollen, or leaking | Internal damage or overcharging | Stop and inspect safely |
| Alternator voltage is low | Weak alternator, regulator, belt, or cable | Test charging output |
| Current draw remains high after sleep | Parasitic circuit or module fault | Isolate circuits with fuses |
Corrosion deserves special attention. White, blue, or green residue can create high resistance and prevent proper cranking. It usually does not explain a full overnight discharge by itself.
Still, corrosion can make a weak battery look drained and can damage a replacement battery. Our research into typical drain sources shows why the starting symptom must be separated from the charging and storage causes.
Car, RV, Motorcycle, Boat, and Portable Battery Differences
The same dead-morning symptom can come from very different systems. A car normally uses one starting battery. An RV may use separate starting and house batteries.
A motorcycle often has a battery one-tenth the capacity of a car unit.
| Setup | Main Battery Role | Why It May Fail in Two Days | Best First Check |
|---|---|---|---|
| Standard car | Cranking power | Accessory drain, weak battery, charging fault | Resting voltage and parasitic draw |
| RV or camper | Starting plus house power | Fridge, monitor system, pump, inverter, or isolator fault | Separate chassis and house circuits |
| Motorcycle | Cranking and electronics | Tiny capacity, USB socket, alarm, or cold weather | Current draw and battery age |
| Boat | Starting, house, or both | Onboard charger, salt corrosion, trolling accessories | Battery type and shore-power draw |
| Laptop or phone | Portable energy storage | Cell aging, battery management fault, or failed charger | Battery health report and charger test |
Starting Batteries Versus Deep-Cycle Batteries
A starting battery is built with many thin plates. This design delivers high current quickly, but repeated deep discharges can damage it. A deep-cycle battery has thicker plates and tolerates longer, steadier discharge.
It may not provide strong enough cranking current for a car.
This distinction matters for RVs and boats. Using a starting battery for house loads can shorten its life. Using a deep-cycle battery as the only starting source may leave you unable to start the vehicle or engine.
If the battery does not match the original equipment manufacturer specification, matching the correct pack should happen before further testing. A battery with the right physical size can still have insufficient reserve capacity, cold cranking amps, terminal placement, or charging requirements.
Reserve Capacity and Group Size
Reserve capacity measures how long a fully charged battery can sustain a moderate electrical load. It does not replace the cold cranking amp rating. Both ratings matter when a vehicle sits in harsh weather.
A higher group size may fit physically, but it can create mounting, cable, and charging complications. A lower group size may fit loosely and fail early. Follow the vehicle specification rather than choosing the cheapest unit.
As of 2026, many start-stop vehicles use enhanced flooded or absorbed glass mat batteries. These units handle frequent engine stops and smart charging better than older flooded designs. A generic replacement may charge correctly but wear out prematurely.
See understanding reserve endurance before selecting a replacement.
Electric and Hybrid Vehicles
An electric car still has a 12-volt auxiliary battery. That battery powers locks, computers, relays, and controls. The large traction battery does not replace it.
Never connect a jump pack directly to an electric vehicle traction battery. Use the approved 12-volt jump points and follow the owner's manual. Hybrid vehicles need the same caution because high-voltage components are present.
The Five-Test Decision Path
Follow the tests in order. Each result sends you toward a different branch. Do not replace the battery merely because it is old.
Age is a probability, not a diagnosis.
You will need:
| Tool or Material | Purpose |
|---|---|
| Fused digital multimeter | Voltage, current, and voltage-drop tests |
| Zero-adjustable clamp meter | Non-invasive parasitic current measurement |
| Battery load tester | Confirms cranking capacity under load |
| Terminal cleaning tool | Removes corrosion from posts and clamps |
| Safety glasses and gloves | Protects against acid, sparks, and short circuits |
| Correct wrench sizes | Prevents damaged nuts and terminals |
| Smart battery maintainer | Maintains charge after the fault is repaired |
A multimeter's amp input is often fused for only 10 amps. Connecting that port directly across battery terminals creates a dangerous short. Verify the probe placement and selected function before making any connection.
Step 1: Check Battery Age, Condition, and Compatibility
Start with the date code, purchase record, and warranty. Most automotive batteries last roughly three to five years. Heat, short trips, loose mounting, and repeated partial charging can shorten that range.
Inspect the case for:
- Swelling or distorted sides.
- Cracks around the casing.
- White, blue, or green terminal deposits.
- Loose hold-down hardware.
- Warm spots or a strong rotten egg smell.
- Damaged cables or rubbed insulation.
Do not proceed with a swollen, cracked, leaking, or frozen battery. Stop the test and arrange proper handling. A frozen lead-acid battery can rupture when recharged or handled roughly.
Before blaming age, confirm that the replacement battery matches the required group size, terminal orientation, hold-down style, and chemistry. Then request a proper load test. Follow the battery manufacturer's temperature correction instructions.
For a clearer explanation of test selection and interpretation, see reading battery test results.
Step 2: Measure Resting Voltage Correctly
Turn off the vehicle. Remove the keys and move them away from the car if it uses keyless entry. Switch off lights, accessories, and chargers.
Allow surface charge to disappear for at least two hours. A longer rest is useful after driving or fast charging.
Touch the meter directly to the battery posts, not the cable clamps. Set it to direct current volts. A resting 12.6-volt reading usually indicates a fully charged flooded or AGM battery.
| Resting Voltage | Approximate State of Charge | What to Do Next |
|---|---|---|
| 12.6 volts or higher | Fully charged | Continue to load and charging tests |
| 12.4 to 12.5 volts | About three-quarters charged | Recharge before final evaluation |
| 12.2 to 12.3 volts | About half charged | Investigate drain or poor charging |
| 12.0 to 12.1 volts | About one-quarter charged | Recharge and load test promptly |
| Below 12.0 volts | Deeply discharged | Recharge, then load test immediately |
These values apply mainly to rested lead-acid batteries. Do not apply them directly to lithium iron phosphate packs. Lithium batteries use a different voltage curve and require chemistry-specific charging.
If the battery reads below 12 volts, recharge it with a charger approved for its chemistry. A deeply discharged battery may look healthy after a charger disconnects. Leave it untouched for several hours, then measure again.
If voltage falls quickly, stored charge is not being retained.
Step 3: Check for Parasitic Drain Fuse by Fuse
A small amount of current is normal. Clocks, security systems, keyless receivers, and control modules need standby power. The problem begins when an unnecessary circuit keeps drawing after the vehicle enters sleep mode.
SAE provides a repeatable method for measuring parasitic current. Follow SAE J1309 parasitic-current procedure or the vehicle manufacturer's procedure when they differ.
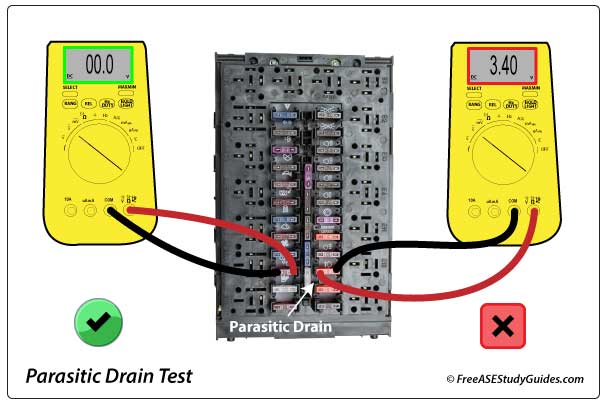
Image source: Bing (Web (fair-use with source credit))
Measure current only after the vehicle has slept. Many modern cars need 20 to 45 minutes. Some modules take longer, especially after a scan tool wakes the network.
For a low-current digital multimeter test:
- Turn the engine off and remove the key.
- Confirm that every door, lamp, radio, and charger is off.
- Wait for the stated sleep period.
- Disconnect the negative battery cable.
- Connect the meter between the negative cable and the negative post.
- Keep metal tools away from both terminals.
- Read the current in amps or milliamps.
A typical healthy vehicle may draw less than 25 to 50 milliamps after sleep. The exact limit varies by model. Values above 100 milliamps are strong evidence of an abnormal drain.
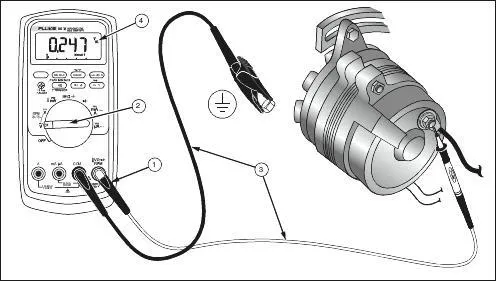
Image source: Bing (Web (fair-use with source credit))
If the reading is high, pull one fuse at a time. Wait for the meter to settle after each removal. Reinstall the fuse before moving to the next one.
A large drop identifies the affected circuit.
Common circuits include:
- Glovebox and trunk illumination.
- Aftermarket alarm or remote starter.
- Dash cam or recorder.
- OBD-II tracker or telematics device.
- Aftermarket audio amplifier.
- Inverter or auxiliary lighting.
- Faulty relay or control module.
- Alternator diode leakage.
Do not pull major engine or safety fuses without a wiring diagram. Removing the wrong fuse can prevent the meter from reading correctly or wake a module. If the draw remains unchanged, inspect aftermarket wiring and the alternator output circuit.
A clamp meter can avoid series connections. Choose one that resolves low milliamps and reset the display to zero near the cable. This method is safer and faster, but it still requires the vehicle to remain asleep.
Step 4: Verify Alternator Output Under Load
A weak alternator may leave the battery partially charged. One short drive will not restore it. Two days of sitting then finishes the job.
With the engine running, measure voltage directly across the battery posts. A typical charging range is about 13.5 to 14.8 volts, although the manufacturer specification controls. Turn on headlights, rear defroster, blower fan, and audio.
Raise engine speed to about 2,000 rpm while watching the reading.
Use these results as a decision guide:
| Reading or Observation | Likely Meaning |
|---|---|
| 13.5 to 14.8 volts and stable | Charging system is probably healthy |
| Below 13 volts under load | Alternator, belt, regulator, or cable problem |
| Above 15 volts | Possible overcharging and battery damage |
| Voltage rises at 2,000 rpm but stays low at idle | Weak alternator output |
| Voltage is normal at alternator but low at battery | Positive or negative cable resistance |
Perform voltage-drop tests on the positive and negative charging cables under load. A large drop points to a connection problem. Clean corroded posts and test again.
Modern vehicles with smart charging may reduce voltage during parts of a drive. Do not condemn the alternator from one idle reading. Compare the result with the vehicle specification.
An alternator normally cannot drain a battery while off, except through internal diode leakage. If the parasitic test shows high draw and the alternator circuit disappears when a specific fuse is pulled, inspect the alternator and its excitation wiring.
Step 5: Inspect Terminals, Grounds, and Hold-Downs
A loose negative cable can prevent cranking and interfere with charging. A corroded positive cable can create the same symptom. A loose battery can suffer internal plate damage from vibration.
Inspect each connection before cleaning it. Check the hold-down, cable ends, ground strap, chassis bonding strap, and engine-to-body ground. Wiggle each cable carefully with the battery disconnected.
Movement at the cable end usually indicates a bad connection.
Clean deposits with a tool designed for battery terminals. Avoid forcing a brush into plastic vents or allowing cleaning solution to enter battery cells. Reconnect tightly, but do not crush the posts.
Apply a thin protective coating if the manufacturer recommends it.
Afterward, repeat the resting voltage, charging voltage, and load tests. A connection repair can restore reliability without a new battery.
Modern Cars, Sleep Modes, and Intermittent Drains
Modern vehicles contain dozens of control modules. They communicate over networks such as Controller Area Network. When the ignition closes, the vehicle enters a sleep sequence.
Modules power down gradually, and the total current draw should fall.
A scan tool can wake that network. Leave it connected overnight and you may create a false parasitic-draw test. Follow the manufacturer's sleep procedure and keep diagnostic equipment off when the vehicle is parked.
Which Sleep-Mode Pattern Do You Have?
| Current Pattern | What It Suggests | Best Next Action |
|---|---|---|
| High draw, then steady decline | Normal module shutdown | Wait for the full sleep period |
| Flat high draw after sleep | Faulty module or accessory | Pull fuses to isolate the circuit |
| Short spikes every few minutes | Scheduled module activity | Log current across several cycles |
| High draw only with the key nearby | Keyless or remote system waking | Move the key farther away and retest |
| High draw after installing an accessory | Added circuit or poor wiring | Inspect accessory power source |
| High draw only in cold weather | Battery capacity loss | Load test at corrected temperature |
Aftermarket alarms are frequent offenders. A relay may remain closed, a siren may stay armed incorrectly, or a wiring adapter may feed power into a circuit that should sleep. Remote-start systems need especially careful installation.
Dash cams can also drain a battery. Some use a constant-power wire in the fuse box. Others use low-voltage cutoff, but that feature only works if the unit and wiring are installed correctly.
A USB charger left in a 12-volt socket is another simple cause.
A battery management sensor may report incorrect state of charge. Start-stop vehicles rely heavily on this information. If the vehicle records repeated recharges or shows a battery sensor fault, use an approved scan tool before replacing the battery.
Battery Maintainers, Smart Chargers, and Storage Options
A battery maintainer supplies charge as the battery slowly loses it. A basic trickle charger may deliver one fixed rate. A smart charger monitors voltage and switches through charging stages.
As of 2026, many compact units provide bulk, absorption, and float charging. Some include pulse modes for sulfation. Do not assume every pulse function restores a damaged battery.
A battery with a dead cell or failed plate cannot be repaired reliably by a consumer charger.
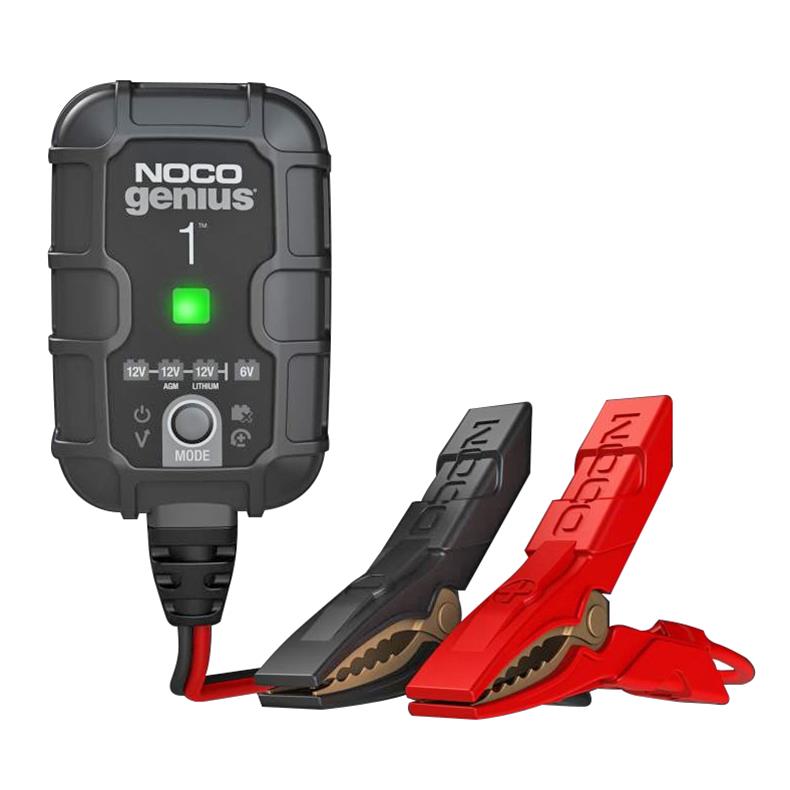
Image source: Bing (Web (fair-use with source credit))
Choosing the Correct Charging Mode
| Battery Type | Best Charger Approach | Key Caution |
|---|---|---|
| Flooded lead-acid | Flooded charging profile | Ventilate and inspect for damage |
| AGM or EFB | AGM-compatible smart profile | Avoid excessive charging voltage |
| Lithium iron phosphate | Lithium iron phosphate profile | Confirm minimum temperature protection |
| RV house battery | Chemistry-specific charger | Separate starting and house charging |
| Seasonal motorcycle battery | Low-current tender | Match voltage and capacity |
A maintainer is most useful when the vehicle will sit for weeks or months. It is not a substitute for repairing parasitic drain. A charger can keep a leaking circuit topped up for a while, but it may also hide the fault until the power is unavailable.
For seasonal storage, connect the maintainer before disconnecting the battery if the vehicle specification allows it. Connect positive first, then negative to an approved grounding point. Plug the charger into wall power last.
Disconnect wall power before removing the battery leads.
For a simple negative-terminal disconnect, attach the maintainer leads first. Remove the negative cable from the battery post while leaving it attached to the maintainer clamp. This avoids sparking at the battery.
Reconnect the cable only after removing the maintainer.
A maintainer usually costs between $30 and $80. A higher-end model may include temperature compensation, battery sensors, diagnostics, and multiple battery chemistries. The right settings matter more than a long feature list.
See safe seasonal storage for the full preparation sequence. A simple upkeep routine can also catch loose terminals, low fluid, and early voltage changes before they strand you.
Common Diagnostic Mistakes That Waste Time and Money
The fastest diagnosis is not always the most aggressive repair. Replacing the battery first is the most common mistake. It may work temporarily, but the new unit can suffer the same drain or charging fault.
| Mistake | Why It Misleads You | Correct Move |
|---|---|---|
| Replacing the battery before testing | A good battery may still be drained | Measure voltage, load, and current |
| Treating corrosion as the only cause | Corrosion usually causes resistance, not full drain | Test both connections and stored charge |
| Using a car charger on lithium iron phosphate | Wrong voltage curve can damage the pack | Select the correct chemistry |
| Connecting an amp meter across the battery | Creates a dangerous short circuit | Use voltage mode or a fused current method |
| Jumping an electric vehicle traction pack | High-voltage system can be severely damaged | Use approved 12-volt jump points |
| Disconnecting a live charging circuit | Can create voltage spikes and component damage | Turn everything off first |
| Leaving a scan tool connected overnight | It may prevent modules from sleeping | Disconnect it before storage testing |
| Storing a partially discharged battery | Sulfation accelerates during storage | Fully charge before parking |
A memory saver can keep radio presets alive, but some units backfeed modules and cause faults. Avoid it unless the vehicle manufacturer specifically approves one. Never use a saver to power a circuit during a parasitic-draw test.
Do not add water to a sealed AGM or enhanced flooded battery. Water top-up applies only to serviceable flooded batteries, and only after a full charge unless the manufacturer gives another instruction. Follow safe battery handling whenever acid, gas, or electrical shorts are possible.
If a replacement is required, use installing a replacement as a reference for correct order, torque, and terminal protection. Dispose of the old unit through a certified recycling program or responsible battery disposal service.
How Long Can a Vehicle Sit Before the Battery Dies?
A healthy battery should not normally die after only two days. Normal self-discharge is usually slow enough to allow several days or weeks of storage. When failure arrives that quickly, look for a weak battery, an active drain, or a charging fault.
Temperature changes the timing. Cold weather does not always drain a battery faster, but it reduces available cranking power. A battery that barely starts in mild weather may fail after a cold night.
Heat does not usually cause overnight failure, but it accelerates internal aging.
| Storage Situation | Expected Result | Diagnostic Priority |
|---|---|---|
| Healthy battery in mild weather | Usually starts after two days | Check if the original battery was already weak |
| Weak battery in cold weather | May fail overnight | Load test and verify state of charge |
| Accessory left plugged in | Can fail within hours | Inspect sockets, lights, and devices |
| Module stuck awake | Drain may build within one night | Measure current after sleep |
| Battery stored partially charged | Failure may occur within days | Recharge and test capacity |
| Maintainer connected correctly | Charge can be sustained for months | Confirm charger status and settings |
Before storage:
- Repair any parasitic drain.
- Fully charge the battery.
- Confirm charging voltage with the engine running.
- Clean and secure the terminals.
- Attach a compatible maintainer or disconnect the battery.
- Check the battery periodically during long storage.
Cold regions require extra care. Charge the battery fully before temperatures fall. A partially discharged battery is more vulnerable to freezing.
Hot regions require attention to age, ventilation, and electrolyte levels in serviceable batteries. Read heat effects on batteries for the long-term impact.
For RVs, disconnect the chassis battery or use a properly configured isolator. For motorcycles, use a low-current maintainer matched to the battery. For boats, inspect salt deposits and onboard charger settings before winter storage.
The Hidden Causes of Overnight Battery Drain
Some drains are obvious. Others hide in places you would never check. After testing the usual suspects, certain issues still cause frustration because they are intermittent or poorly documented.
The most frustrating cases involve modules that wake up randomly. A telematics unit may report to its server every few minutes. A body control module may cycle on a timer.
Both create short current spikes that look normal on a single measurement but add up over hours.
Intermittent Parasitic Drain Patterns
| Pattern on Meter | What It Suggests | How to Confirm |
|---|---|---|
| Steady 60 milliamps with no change | Normal accessory draw or weak module | Verify by pulling each fuse until drop occurs |
| Steady 150 milliamps constantly | Fault in one identifiable circuit | Fuse pull method should isolate it quickly |
| Periodic spikes every 5 to 10 minutes | Scheduled module activity, such as a tracker | Log current over 30 minutes to identify the rhythm |
| Random spikes between 30 and 200 milliamps | Intermittent relay or control fault | Use current graphing or data logger |
| Gradually rising overnight | Slowly failing component heating up | Monitor temperature of suspect components |
A smart multimeter with logging capability makes this diagnosis much easier. Basic meters give only a snapshot. They cannot reveal a module that wakes once per hour.
If your symptoms match the intermittent pattern, consider a clamp meter with data logging or a dedicated parasitic-draw tool.
Wiring Damage from Previous Repairs
Every major repair carries a small risk of leaving a wire exposed. A ground strap might touch a metal bracket near a live circuit. An aftermarket radio harness could rest against the steering column.
Heat and vibration eventually wear through insulation.
Look for these warning signs:
- Frayed wire near recent repairs
- Heat discoloration on nearby panels
- Melted connector housings
- Burnt smell after parking
- Fuses that blow repeatedly
If you recently installed an alarm, audio system, winch, or light bar, inspect that wiring thoroughly. A single wire touching chassis ground can create a continuous drain that only a trained eye will find.
When the Problem Returns After Repair
Sometimes the fix works for three days and then fails again. This pattern points to one of three causes.
| Returning Symptom | Likely Cause | What to Recheck |
|---|---|---|
| Drain returns to original level | New accessory wired incorrectly | Trace every new connection |
| Drain gradually increases | Aging component nearing failure | Test replaced part within circuit |
| Drain appears only after rain | Moisture in a connector | Inspect ground points and seals |
| Drain spikes only when cold | Thermal expansion exposing a wire | Check wiring harness movement |
| Alternator voltage drifts | Belt slipping intermittently | Inspect belt tension and pulley alignment |
A recurring problem deserves a second, slower inspection. Take photos of every connection before disassembly. Label each wire.
Use these records during reassembly. Most repeat failures come from one missed step during the first repair.
Seasonal Storage: Preparing Your Battery for Extended Parking
Seasonal storage requires more than disconnecting the battery. It demands a complete preparation sequence that protects both the battery and the vehicle's electrical system.
Follow this checklist before parking any vehicle for more than two weeks.
| Task | Why It Matters | When to Perform It |
|---|---|---|
| Full charge before storage | Prevents sulfation during idle | Immediately before parking |
| Clean all terminal surfaces | Reduces corrosion and resistance | After charging |
| Apply terminal protectant | Slows future oxidation | After cleaning and tightening |
| Inspect cable clamps for cracks | Cracked clamps lose contact | During every oil change |
| Check hold-down tightness | Vibration damages internal plates | Before and after storage |
| Note tire pressure loss | Low pressure damages tires slowly | Monthly during storage |
| Cover exposed exhaust | Prevents moisture and pests | Optional, easy task |
| Check fluid levels | Low fluids damage engines | Before long storage |
For vehicles stored longer than a month, attach a smart maintainer before disconnecting the battery if the vehicle manual allows it. Some manufacturers warn against connected chargers during long storage due to voltage sensitivity in modern electronics. Always verify the recommendation before proceeding.
Climate-Specific Storage Advice
Cold storage requires a fully charged battery. A discharged lead-acid battery can freeze at temperatures above 20°F. A fully charged battery will not freeze until below minus 60°F.
Charge level is literally your freeze protection.
Hot storage accelerates internal corrosion. Keep the vehicle in shade when possible. High engine bay temperatures cook batteries from below.
A battery shelf near a heater vent is a quick path to early failure.
For motorcycles and small engines, battery capacity shrinks dramatically with cold weather. Consider removing the battery entirely and storing it indoors at room temperature. A small 4-amp maintainer works well for this.
Check voltage monthly and top off with a charger if needed.
Reading Charging Voltages Correctly
Voltage measurements sound simple. In practice, small errors create big misunderstandings. A loose probe, a wet surface, or a warm battery can shift readings enough to mislead an otherwise careful diagnostician.
Where to Place Your Probes
Never measure charging voltage at the battery terminals with corroded connections. The reading will reflect contact resistance rather than actual alternator output. Instead, place your probes directly on the battery posts.
Clean the contact point first with a wire brush or sandpaper.
For a more precise test, measure at the starter solenoid or junction block. These points are closer to the alternator output and bypass cable resistance. Compare the alternator terminal voltage to the battery terminal voltage.
A difference above 0.2 volts indicates excessive cable resistance.
Temperature Effects on Voltage Readings
Lead-acid batteries require voltage corrections for temperature. Cold electrolyte increases internal resistance. Warm electrolyte decreases it.
A charger that reads perfect at 77°F may undercharge at 32°F without compensation.
| Temperature | Correction per Cell | Total Correction (6 cells) |
|---|---|---|
| 32°F (0°C) | +0.03V | +0.18V above standard |
| 50°F (10°C) | +0.015V | +0.09V above standard |
| 77°F (25°C) | 0.00V | Baseline reference |
| 95°F (35°C) | -0.015V | -0.09V below standard |
| 113°F (45°C) | -0.03V | -0.18V below standard |
Smart chargers and modern alternators compensate automatically. Manual interpretation of voltage readings requires awareness of ambient temperature. If your garage is cold, a 12.6-volt reading does not mean full charge.
Add the correction and measure again.
Load Testing Beyond the Parts Store
Parts store load testers give a quick answer but often lack the precision needed for borderline batteries. They typically apply a fixed current for 15 seconds and read the resulting voltage. A passing result does not guarantee long-term reliability.
A proper load test applies half the Cold Cranking Amp rating for 15 seconds while monitoring voltage. The battery must stay above 9.6 volts throughout the test at 70°F. Below that threshold, the battery has failed.
Adjust for temperature using the correction chart from the Battery Council International standards.
Many technicians skip the temperature correction and pass a weak battery. Always request the corrected reading. A battery that barely passes at 32°F would fail immediately at normal operating temperature.
Jump-Starting Safely in Extreme Conditions
Jump-starting is familiar to most drivers. Proper technique still matters, especially with modern vehicles and extreme temperatures. Wrong order or poor connections can damage electronics or cause injury.
The Safe Sequence for Connecting Jumper Cables
- Position the donor vehicle close but ensure cables reach both batteries.
- Turn off both vehicles and engage parking brakes.
- Connect positive cable to the dead battery positive post.
- Connect the other positive end to the donor battery positive post.
- Connect negative cable to the donor battery negative post.
- Connect the other negative end to an unpainted metal ground point on the disabled vehicle's engine block or chassis.
- Start the donor vehicle and let it run for two minutes.
- Attempt to start the disabled vehicle.
- If it starts, let both run together for five minutes.
- Disconnect in reverse order, negative first.
Never connect the final negative clamp to the dead battery negative post. Hydrogen gas around the battery can ignite from a spark. A remote ground point eliminates that risk.
Frozen Battery Warning
Do not attempt to jump-start a visibly frozen battery. Ice inside the cells expands and can crack the case. Thaw the battery completely before any charging attempt.
Place the vehicle in a warm garage for 24 hours or use a low-current charger at room temperature.
If the battery case feels hard and the posts are difficult to clean, the electrolyte may be frozen. Visual inspection should show clear liquid when tilted gently. Cloudy or crystalline appearance confirms ice.
Set the battery aside and arrange proper thawing before proceeding.
When Jump-Starting Fails Repeatedly
If the vehicle starts but dies immediately after disconnecting the cables, the alternator is not charging. Turn off all accessories and drive directly to a service facility. Do not shut off the engine until you reach help.
If the vehicle will not crank at all, the issue is mechanical or connection-related. Check the starter solenoid click, inspect the ignition switch, and verify the transmission is in park or neutral. A faulty safety interlock can prevent cranking even with a healthy battery.
Building a Long-Term Battery Health Routine
Regular checks cost nothing and prevent most roadside emergencies. A 10-minute monthly inspection catches problems before they strand you.
Monthly Maintenance Tasks
| Task | Tool Needed | Time Required | Risk if Skipped |
|---|---|---|---|
| Visual terminal inspection | Eyes, flashlight | 2 minutes | Corrosion buildup, poor connection |
| Voltage check at rest | Multimeter | 1 minute | Missed slow discharge |
| Tighten hold-down clamp | Wrench | 1 minute | Internal plate damage from vibration |
| Clean terminal deposits | Brush, baking soda | 3 minutes | Increased resistance, heat |
| Check fluid level (flooded only) | Hydrometer or dip tube | 2 minutes | Plate exposure and sulfation |
For flooded batteries, check electrolyte levels every three months during active use. Add only distilled water after a full charge. Do not overfill.
The electrolyte should sit just below the fill neck. Overfilled batteries spill acid during driving and corrode surrounding components.
Quarterly Deep Checks
Every three months, perform these extended diagnostics:
- Load test the battery, preferably after a full charge overnight.
- Measure parasitic draw if the vehicle has electronics or an alarm.
- Inspect the alternator belt for cracks, glazing, and proper tension.
- Check all ground straps for continuity and corrosion.
- Review battery warranty status and expiration date.
Annual Review Checklist
Once a year, review your complete battery strategy:
- Compare the current battery's age against replacement recommendations.
- Update your maintainer settings for seasonal changes.
- Replace any degraded cables or damaged connectors.
- Record voltages and current draws for future comparison.
- Clean the battery tray and surrounding area thoroughly.
A written log turns vague memories into actionable data. When two batteries of the same model fail at different ages, the log reveals which environmental factor caused the difference. Over time, these records become an invaluable diagnostic tool.
When Professional Diagnosis Is Worth the Cost
Some problems exceed the capability of basic tools and owner knowledge. Spending money on professional help is better than buying parts that do not fix the issue.
Signs You Need a Certified Technician
| Symptom | Why DIY May Not Suffice |
|---|---|
| Intermittent drain that vanishes during testing | Requires specialized scan tools and wiring diagrams |
| Multiple electrical gremlins alongside dead battery | Possible network communication fault |
| Alternator passes bench test but fails in vehicle | Installation or compatibility issue requiring expertise |
| Battery dies despite new maintainer | Complex parasitic source beyond simple fuses |
| Swollen or leaking battery after jump attempt | Possible internal short requiring professional handling |
| Check engine light with battery-related codes | Control module communication error needs diagnosis |
What to Expect from a Professional Service
A qualified technician will:
- Read manufacturer-specific parasitic-draw specifications.
- Use bidirectional controls to activate and deactive modules during testing.
- Perform voltage-drop tests on every circuit in the charging system.
- Scan for stored fault codes in all major control modules.
- Check battery sensor data for state-of-health information.
- Replace faulty components with correct OEM-equivalent parts.
Ask for a written diagnosis with measured values. Any competent technician should provide numbers, not guesses. If the explanation is vague or the cost estimate is high without supporting data, seek a second opinion.
Avoiding Unnecessary Part Replacements
The parts industry profits from repeated replacements. Protect yourself by insisting on measurement-based diagnoses. A battery that passes a load test should not be replaced unless parasitic drain or charging faults prove otherwise.
Similarly, an alternator that outputs correct voltage should not be replaced just because the battery is old.
Request permission before any part replacement. A honest technician will confirm each finding with data and let you decide. This collaborative approach saves money and builds trust for future service needs.
Frequently Asked Questions
Why does my car battery die after sitting two days?
A battery that dies after two days is usually being drained by an accessory, control module, or faulty relay. Another possibility is weak battery capacity or an alternator that failed to recharge it. Test resting voltage first, then charging voltage and parasitic current.
Replacing the battery without these tests may only repeat the problem.
How can I tell whether the battery or alternator is bad?
Measure the battery with the engine off, then measure it with the engine running. A healthy charging system usually produces roughly 13.5 to 14.8 volts, although specifications vary. Next, perform a load test on the battery.
Low resting voltage followed by low charging voltage points toward storage or charging trouble.
What is acceptable parasitic draw for a parked vehicle?
Many modern vehicles draw less than 25 to 50 milliamps after reaching sleep mode. The exact limit depends on the vehicle. Wait the full manufacturer-specified sleep period before measuring.
A reading above 100 milliamps is a strong sign of abnormal drain. Use the vehicle manual when it provides a different limit.
Should I disconnect the negative terminal during storage?
Disconnecting the negative terminal can reduce parasitic drain, but it may reset clocks, learned settings, and security systems. A compatible maintainer is usually more convenient for long storage. If you disconnect the battery, attach the maintainer first when possible, then remove the negative cable from the post without sparking.
Can cold weather alone make a battery die overnight?
Cold weather can expose a weak battery, but it does not usually create a drain by itself. Lower temperatures reduce available cranking current and slow chemical reactions inside the battery. A battery that is old, partially charged, or sulfated may fail after one cold night.
Charge and load test it before storage.
What should I do if the battery is swollen, leaking, or frozen?
Stop testing and do not charge the battery. Keep flames and sparks away, wear eye protection, and place the battery on a stable surface. A swollen or leaking unit may contain damaged plates and escaped electrolyte.
A frozen lead-acid battery can rupture during charging. Follow local recycling guidance and arrange safe handling.

Tony Kilmer is an auto mechanic and the author behind CarTruckAdvisor.com. He shares practical, no-nonsense guidance on car and truck maintenance, common problems, and repair decisions—helping drivers understand what’s going on and what to do next.