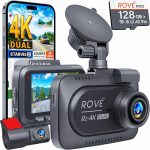
Imagine driving through a scenic mountain pass, only to have a distracted driver swerve into your lane. Your dash cam captures the entire incident, proving your innocence to the insurance company. But what happens when your memory card fills up? Does the camera stop recording at the most critical moment? This is where loop recording becomes your silent guardian, ensuring you never miss a crucial event.
In 2026, dash cams have become nearly as essential as seatbelts for modern drivers. With the average dash cam user recording over 100 hours of footage per month, understanding loop recording is critical to ensuring your device works when you need it most. This article will explain exactly what loop recording means, how it works, the different types available, and how to configure it for maximum protection. Whether you are a new dash cam owner or looking to upgrade your setup, this guide will help you make informed decisions about your vehicle’s digital witness.
The Core Definition: How Loop Recording Actually Works
Loop recording is a fundamental feature in modern dash cams that allows continuous recording by automatically overwriting the oldest video files with new footage. When your memory card reaches its storage capacity, the dash cam does not stop recording. Instead, it identifies the oldest unlocked video file and begins writing new data over it. This creates an endless loop of recording, hence the name. Without this feature, a dash cam would simply stop recording once the card is full, potentially missing the exact moment you need captured.
The mechanics behind loop recording are surprisingly elegant. Most dash cams divide your memory card into segments, typically ranging from one to five minutes in length. As you drive, the camera saves each segment as a separate video file. When the card reaches 95% to 99% capacity, the camera’s firmware begins a priority check. It looks for files that are not marked as protected or locked, usually from the earliest recording session. The camera then overwrites these files in chronological order, ensuring that the most recent footage is always preserved. For example, if you have a 64GB card recording at 1080p, you might store roughly 8 to 10 hours of footage. After that, the camera starts recycling the first hour of footage to make room for new recordings.
A critical nuance that many drivers overlook is the relationship between loop recording and event detection. Most dash cams have a G-sensor that detects sudden impacts, such as collisions or hard braking. When triggered, the camera locks the current video file, preventing it from being overwritten during the loop cycle. This means your accident footage is safe, even if the loop recording continues for days afterward. However, if your memory card fills up with too many locked files, the camera may struggle to find space for new recordings. This is why regularly reviewing and deleting unnecessary locked files is a best practice for dash cam owners.
Loop Length Settings: Choosing Between 1, 3, and 5 Minute Clips
One of the most common settings you will encounter in a dash cam menu is the loop recording length, often offering options like 1, 3 minutes, or 5 minutes per video file. This setting determines how long each individual video segment will be before the camera starts a new file. The choice you make has significant implications for both file management and the ease of finding specific events. In 2026, most premium dash cams default to 3-minute loops, which strikes a balance between convenience and storage efficiency.
A 1-minute loop creates many small files, which can be beneficial if you need to quickly locate a specific moment without scrubbing through long videos. However, the downside is that your memory card’s file system must manage hundreds of small files, which can slightly increase the risk of file corruption over time. Additionally, if an incident occurs near the end of a 1-minute segment, you might have to piece together two separate files to see the full event. On the other hand, a 5-minute loop reduces the number of files making the card’s file system more stable, but it requires more time to find a specific moment within a longer video.
The practical advice for most drivers is to use 3-minute loops. This duration is long enough to capture most incidents from start to finish, including the moments before and after an event. It also keeps file sizes manageable for quick transfers to a computer or smartphone. If you frequently review footage for minor events, such as near-misses or parking incidents, consider using 1-minute loops for easier navigation. For long road trips where you want to minimize file management, 5-minute loops are a solid choice. Remember that the loop length does not affect the total recording time on your card; it only changes how the footage is segmented.
Memory Card Management: Sizing and Formatting for Optimal Loop Recording
The memory card is the unsung hero of your dash cam setup, and its size directly impacts how long you can record before the loop begins overwriting old footage. In 2026, the standard recommendation is to use a high-endurance microSD card with a capacity of at least 128GB. High-endurance cards are specifically designed for the constant read-write cycles of dash cam recording, lasting up to 10 times longer than standard cards. A 128GB card at 1080p resolution typically provides 16 to 20 hours of continuous recording before the loop kicks in, which is more than enough for daily commutes.
Formatting your memory card correctly is just as important as its size. Most dash cams require the card to be formatted in the FAT32 file system, as this is the most compatible with the camera’s firmware. However, FAT32 has a limitation: it cannot handle individual files larger than 4GB. This is another reason why loop recording segments are kept short. If you use a card larger than 32GB, you may need to format it using a third-party tool on your computer, as Windows and Mac default to exFAT for larger drives. Always format the card inside the dash cam itself when possible, as this ensures the camera creates the correct folder structure for loop recording.
A common mistake that leads to loop recording failures is using a card that is too slow. Dash cams require a minimum write speed of Class 10 or UHS-I U1 for smooth 1080p recording. For 4K dash cams, which are increasingly common in 2026, you need UHS-I U3 or V30 rated cards. If your card is too slow, the camera may skip frames, produce corrupted files, or fail to start the loop recording process entirely. To test your card’s performance, record a 10-minute drive and then review the footage for any stuttering or missing segments. If you notice issues, upgrade to a faster card immediately.
Advanced Features: Smart Loop Recording and Cloud Integration
The dash cam industry has evolved significantly by 2026, loop recording is no longer a simple overwrite function. Many premium models now feature smart loop recording, which uses artificial intelligence to prioritize which files to overwrite. Instead of simply deleting the oldest file, the camera analyzes footage for motion, audio events, or detected objects like pedestrians and vehicles. Files with no activity are overwritten first, while clips containing potential events are preserved longer. This ensures that even if you forget to manually save a clip, the camera’s AI may recognize its importance and keep it safe from the loop cycle.
Cloud-connected dash cams have introduced another layer of sophistication to loop recording. These cameras can automatically upload critical footage to a cloud server before it gets overwritten. For example, if your G-sensor detects a collision, the camera immediately uploads the incident video to your cloud account, freeing up space on the memory card for continued loop recording. Some systems even allow you to set rules, such as always uploading footage from parking mode or when the camera detects a specific license plate. This means your loop recording never loses important data, as the cloud acts as an infinite backup.
Another advanced feature gaining traction is dual-channel loop recording management. If you have a front and rear camera system, the firmware must intelligently balance recording between both lenses. Some cameras allocate separate folders for front and rear footage, while others interleave the files. The best systems in 2026 allow you to set different loop lengths for each channel, such as 3-minute loops for the front camera and 5-minute loops for the rear, since rear footage is typically less eventful. When configuring your dash cam, check if it offers independent loop settings for each channel, as this can significantly extend your effective recording time.
Troubleshooting Common Loop Recording Problems
Key Takeaways
- ✓ Loop recording automatically overwrites the oldest unlocked video files, ensuring continuous recording without manual intervention.
- ✓ Choose a loop length of 3 minutes for the best balance between file manageability and incident capture.
- ✓ Use a high-endurance microSD card with at least 128GB capacity and a U3 or V30 speed rating for reliable 4K recording.
- ✓ Smart loop recording with AI prioritization and cloud backup can prevent important footage from being overwritten.
- ✓ Regularly review and delete locked G-sensor files to prevent “Card Full” errors and maintain smooth loop recording.
Frequently Asked Questions
Will loop recording delete my accident footage?
No, loop recording will not delete accident footage if your dash cam has a G-sensor. When a collision or sudden impact is detected, the camera locks the current video file, marking it as protected. The loop recording system will only overwrite unlocked files, so your accident footage remains safe. However, if you manually save too many clips, the card may fill up, so periodically review and delete unnecessary locked files.
long can I record before loop recording starts overwriting?
The recording time before loop recording begins depends on your memory card size, video resolution, and bitrate. For example, a 128GB card recording at 1080p with a standard bitrate typically stores 16 to 20 hours of footage. At 4K resolution, this drops to roughly 4 to 6 hours. After reaching capacity, the camera starts overwriting the oldest footage. You can calculate your specific time by checking your camera’s bitrate in the settings menu.
Can I turn off loop recording on my dash cam?
Most dash cams do not allow you to disable loop recording entirely, as it is a core function for continuous operation. However, some models offer a “Manual Recording” mode that stops recording when the card is full, but this is rare and not recommended. If you want to preserve specific footage, use the manual save button or G-sensor lock feature instead of disabling loop recording. Disabling it would cause the camera to stop recording, defeating its purpose.
Does loop recording work differently in parking mode?
Yes, loop recording in parking mode often uses a different algorithm. Many dash cams use time-lapse or low-frame-rate recording in parking mode to extend storage. The loop recording still overwrites the oldest footage, but the files are much smaller. Some advanced cameras use motion detection in parking mode, only recording when movement is detected, which significantly reduces the frequency of loop overwrites. Check your camera’s parking mode settings to understand how it handles loop recording.
Why does my dash cam say “Card Full” even loop recording enabled?
The “Card Full” error typically occurs when too many video files are locked or protected, leaving no unlocked files for the loop recording to overwrite. This can happen if your G-sensor sensitivity is set too high, causing it to lock files from every bump or pothole. To fix this, lower the G-sensor sensitivity in the settings, manually delete locked files, or format the memory card. If the problem persists, your memory card may be failing and needs replacement.
Conclusion
Loop recording is the silent workhorse that keeps your dash cam running 24/7, ensuring you never miss a critical moment on the road. By understanding how it works, choosing the right loop length, and managing your memory card properly, you can maximize the reliability of your dash cam. The technology has advanced significantly by 2026, with smart AI features and cloud integration making loop recording smarter than ever. Whether you are protecting yourself from fraudulent claims or simply documenting your road trips, mastering loop recording is essential.
Now is the perfect time to review your dash cam settings. Check your loop recording length, verify your memory card’s speed and capacity, and ensure your G-sensor sensitivity is properly calibrated. If you have not done so in the last month, format your memory card inside the camera to refresh the file system. By taking these simple steps, you will ensure that your dash cam is always ready to capture the unexpected. Drive with confidence, knowing your digital witness is always recording.

Tony Kilmer is an auto mechanic and the author behind CarTruckAdvisor.com. He shares practical, no-nonsense guidance on car and truck maintenance, common problems, and repair decisions—helping drivers understand what’s going on and what to do next.