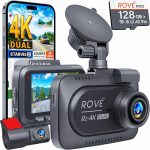
You just bought a new Subaru Outback, Forester, or Crosstrek, and you want the protection of a dash cam. But as you hold the camera up to the windshield, a warning light flashes on your dashboard. The EyeSight system, Subaru’s suite of dual-camera safety features, is suddenly disabled. This is the exact moment thousands of Subaru owners face each year: the conflict between recording your drive and keeping your advanced driver-assistance systems (ADAS) fully operational.
This guide is designed to solve that problem permanently. By the end of this article, you will know the precise mounting locations that keep your EyeSight cameras unobstructed, the types of mounts that work best for Subaru’s unique windshield geometry, and how to wire your dash cam without voiding your warranty. We will cover everything from the 2026 model year updates to proven installation techniques used by professional installers. Whether you drive a Legacy, Ascent, or WRX, this is the only resource you need to install a dash cam safely and legally in your Subaru.
Understanding the Subaru EyeSight System and Windshield Zones
The Subaru EyeSight system relies on two stereo cameras mounted at the top center of the windshield, near the rearview mirror. These cameras work together to create a three-dimensional image of the road ahead, enabling features like adaptive cruise control, pre-collision braking, and lane-keeping assist. The critical factor for dash cam installation is that these cameras require a clear, unobstructed view through a specific area of the glass. Any object placed within this zone can cause the system to malfunction or shut down entirely.
Subaru defines this exclusion zone as a rectangular area extending approximately 8 inches to the left and right of the camera housing, and about 6 inches downward from the top edge of the windshield. In 2024 and later models, Subaru updated the EyeSight system with wider-angle lenses and improved processing, but the physical mounting constraints remain the same. The key difference is that newer models are more sensitive to reflections and glare, meaning a poorly placed dash cam can cause intermittent system errors even if it is technically outside the camera’s field of view.
The safest approach is to treat the entire area directly behind the rearview mirror as a no-go zone. Instead, you should focus on two primary mounting locations: the passenger-side upper corner of the windshield, or the lower center area near the dashboard. Each location has trade-offs regarding field of view, wiring complexity, and potential interference with other sensors. Understanding these trade-offs is the first step toward a successful installation that does not compromise your safety features.
The Best Mounting Location: Passenger-Side Upper Corner
For the vast majority of Subaru models with EyeSight, the passenger-side upper corner of the windshield is the optimal mounting location. This position places the dash cam outside the EyeSight camera zone while still providing a clear, forward-facing view of the road. To find the exact spot, sit in the driver’s seat and look at the windshield. You want to mount the camera so that its lens is positioned to the right of EyeSight camera housing, with the camera body sitting just below the headliner. A good rule of thumb is to place the camera so that the right edge of the EyeSight housing is visible in the left edge of your dash cam’s live view.
When mounting in this location, you must consider the angle of the windshield. Subaru windshields are relatively steep, especially in the Outback and Forester. This means a standard adhesive mount may point the camera too high, capturing more sky than road. To solve this, use a dash cam with a rotating or articulating mount that allows you to adjust the lens angle downward. Alternatively, you can purchase a wedge-shaped adhesive mount that compensates for the windshield angle. Many Subaru owners in online forums recommend the Viofo A229 Pro or the Thinkware U1000 for their excellent angle adjustment capabilities.
One common mistake is mounting the camera too close to the A-pillar. The A-pillar on modern Subarus contains side-curtain airbags and, in some trims, additional sensors for blind-spot monitoring. If you mount the camera directly against the pillar, the airbag deployment could dislodge the camera or send it flying into the cabin. Leave at least 2 inches of clearance between the camera body and the A-pillar trim. Also, ensure that the camera’s field of view does not include the rearview mirror, as the mirror’s auto-dimming feature can cause glare and reflection issues in the recorded footage.
Alternative Mounting Locations and Their Pros and Cons
If the passenger-side upper corner does not work for your specific vehicle or dash cam model, the lower center area of the windshield is a viable alternative. This involves mounting the camera on the dashboard itself, or on the windshield just above the dashboard, directly in front of the steering wheel. The advantage of this location is that it is far below the EyeSight cameras, eliminating any risk of obstruction. However, this position has significant drawbacks. The camera will capture a lower perspective, which can make it harder to read license plates or see over the hood of the car. Additionally, the camera may be more visible to thieves and can create a glare on the windshield at night.
Another option is to use a rearview mirror mount. Several companies, such as BlendMount and MirrorTap, offer custom brackets that attach your dash cam directly to the stem of the rearview mirror. This places the camera in the center of the windshield, directly behind the mirror, which is the traditional “dead zone” for EyeSight. However, this only works if your specific Subaru model has enough space between the mirror stem and the EyeSight housing. On 2025 and 2026 models, this gap has narrowed significantly, making mirror mounts impractical for most owners. If you choose this route, test the fitment before permanently attaching anything.
For owners of the Subaru Solterra (the electric SUV), the mounting options are slightly different. The Solterra uses a single-camera EyeSight system, but it also has a forward-facing radar sensor integrated into the lower grille. The windshield mounting rules are the same, but you must also avoid placing any metal objects or electronic devices near the base of the windshield, as they can interfere with the radar signal. In all cases, the absolute worst location is directly in front of the EyeSight cameras, even if you think the camera is small enough to fit. Subaru’s system is calibrated to detect even partial obstructions, and a dash cam lens can create a blind spot that triggers a warning light.
Wiring Your Dash Cam Without Voiding the Warranty
Testing and Calibrating After Installation
After you have mounted and wired your dash cam, the installation is not complete until you have verified that the EyeSight system is functioning correctly. Start your Subaru and look at the instrument cluster. If you see a yellow or orange warning light for EyeSight, the system has detected an obstruction. This could be caused by the dash cam body, the mount, or even a reflection from the camera lens. If the warning light appears, try repositioning the camera slightly to the left or right, or adjust the angle of the lens. In some cases, a simple tilt of the camera can eliminate the reflection that is confusing the EyeSight sensors.
Next, take the car for a test drive on a clear, straight road. Engage the adaptive cruise control and lane-keeping assist. Pay attention to whether the system behaves erratically. Does the cruise control disengage unexpectedly? Does the lane-keeping assist pull the car to one side? These are signs that the dash cam is still interfering. If everything feels normal, the installation is likely successful. However, for 2026 models with the latest EyeSight software, Subaru recommends performing a full system calibration at a dealership if any component on the windshield has been changed or moved. This is a precautionary step that ensures the cameras are perfectly aligned.
Finally, check your dash cam footage. Review a few minutes of driving to ensure the video is clear, the exposure is correct, and there are no reflections from the dashboard or the rearview mirror. If you mounted the camera in the passenger-side upper corner, you may notice that the footage shows the edge of the EyeSight housing. This is normal and acceptable. The goal is to have a clear view of the road ahead without any part of the camera or mount appearing in the video. If you see the mount, you need to adjust the camera’s position or angle. A properly installed dash cam should be invisible from the driver’s seat and should never trigger a warning light.
Key Takeaways
- ✓ Mount your dash cam in the passenger-side upper corner of the windshield, at least 8 inches away from the EyeSight camera housing.
- ✓ Never place any object, including a dash cam, directly in front of or within 6 inches below the EyeSight stereo cameras.
- ✓ Use a hardwire kit with a low-voltage cutoff and a fuse tap to avoid battery drain and electrical issues.
- ✓ Route the power cable behind the A-pillar airbag, not in front of it, to maintain safety during deployment.
- ✓ Always test the EyeSight system after installation by checking for warning lights and test-driving with adaptive cruise control active.
Frequently Asked Questions
Can I mount a dash cam on the windshield directly below the EyeSight cameras?
No, this is not recommended. The area directly below the EyeSight cameras is within the system’s calibration zone. Even a small camera can create a blind spot or cause reflections that trigger a system error. The safest location is to the side of the camera housing, not below it.
Will a dash cam void my Subaru warranty?
No, installing a dash cam itself will not void your warranty. However, if you damage the windshield, the EyeSight system, or the vehicle’s electrical system during installation, those specific repairs may not be covered. Using a fuse tap and avoiding cutting factory wires is the best way to protect your warranty.
What is the best dash cam for a 2026 Subaru Outback with EyeSight?
The best dash cams for Subaru vehicles are those with compact bodies and adjustable mounts. The Viofo A229 Pro, Thinkware U1000, and BlackVue DR900X-2CH are popular choices. Look for models that offer a low-profile adhesive mount and a wide dynamic range to handle the steep windshield angle.
How do I know if my dash cam is interfering with EyeSight?
The most obvious sign is a yellow or orange EyeSight warning light on your dashboard. You may also notice that your adaptive cruise control disengages frequently, or that the lane-keeping assist system is inconsistent. If you see any of these symptoms, reposition the camera immediately.
Can I use a suction cup mount on a Subaru windshield?
Suction cup mounts are not recommended for Subaru vehicles with EyeSight. They are bulkier than adhesive mounts and are more likely to fall off in hot weather. Additionally, the suction cup can create a larger obstruction area. A high-quality adhesive mount is the safer and more reliable choice.
Conclusion
Installing a dash cam in your Subaru with EyeSight does not have to be a compromise between safety and security. By understanding the precise mounting zones required by the dual-camera system, you can choose a location that captures excellent footage without disabling your vehicle’s most important safety features. The passenger-side upper corner remains the gold standard for installation, offering the best balance of visibility, safety, and ease of wiring. Remember to always test the system after installation and to route your cables with care, especially around the A-pillar airbags.
As dash cam technology continues to evolve, the 2026 models offer features like 4K resolution, cloud connectivity, and parking mode that make them more valuable than ever. Do not let the fear of interfering with EyeSight stop you from adding this essential layer of protection to your Subaru. With the guidance provided in this article, you can proceed with confidence. Take the time to plan your installation, choose the right mount, and verify the system’s operation. Your future self will thank you when you have clear, reliable footage of the road ahead.

Tony Kilmer is an auto mechanic and the author behind CarTruckAdvisor.com. He shares practical, no-nonsense guidance on car and truck maintenance, common problems, and repair decisions—helping drivers understand what’s going on and what to do next.